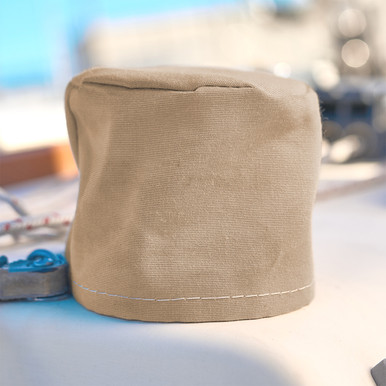
How to make Winch Covers with an inside choker using SCRAPS - FREE Pattern
Make a better-fitting winch cover with this DIY guide! Small tweaks improve the Sailrite design for a snug, functional fit. Get step-by-step instructions, precise measurements, and expert tips to craft a durable, stylish cover tailored for your boat.

2/2025 Written by Chris & Su Wallace from Squid and Jelly's Great Adventure
As we hang out at Abel's Marina in Rio Dulce, Guatemala, waiting for the rain to lighten up so we can finish our hull work, I'm making the most of our two-bedroom apartment rental. Since it's located in the marina it offers the perfect space for my sewing projects!
After tackling our salon and cockpit cushions, I was left with a pile of fabulous fabric scraps - too nice (and too pricey!) to toss, but with no clear purpose. Then, we got a shiny new winch for our parasailor, and ding!—lightbulb moment! Those scraps finally had a mission: the perfect DIY winch cover!
Table of Contents
- Sailrite's video
- Small Tweaks, Big Wins!
- Supplies
- Recommended Tools
- Pattern
- Measurements
- Cutting Fabric
- Sewing
- Finishing Touches
- Treasure By The Sea Bonaire
If you love DIY projects, you’ve probably come across Sailrite’s helpful videos. When I watched How to make a winch cover for you Boat (yes, they forgot the "r" in "your"), I noticed multiple comments mentioning that the final cover was small. So, I decided to make a few adjustments to ensure a better fit and functionality.
On my first winch cover following this video, I increased the measurements but encountered a few issues:
- The top circle was too big due to added seam allowance since the measurement was based on the base.
- The base was too tight since it matched the top’s size.
- Since the choker was the same width as the side, the seams became bulky, making it challenging to sew with my machine. This issue was especially difficult when attaching the circle top with cording.
- The choker was too short, making it hard to fit over the tight base.
- Sewing the sides first, then attaching the top, led to small puckers in the seam.
- I found it difficult to sew the 2 pieces shock cord together and wasted a lot of thread.
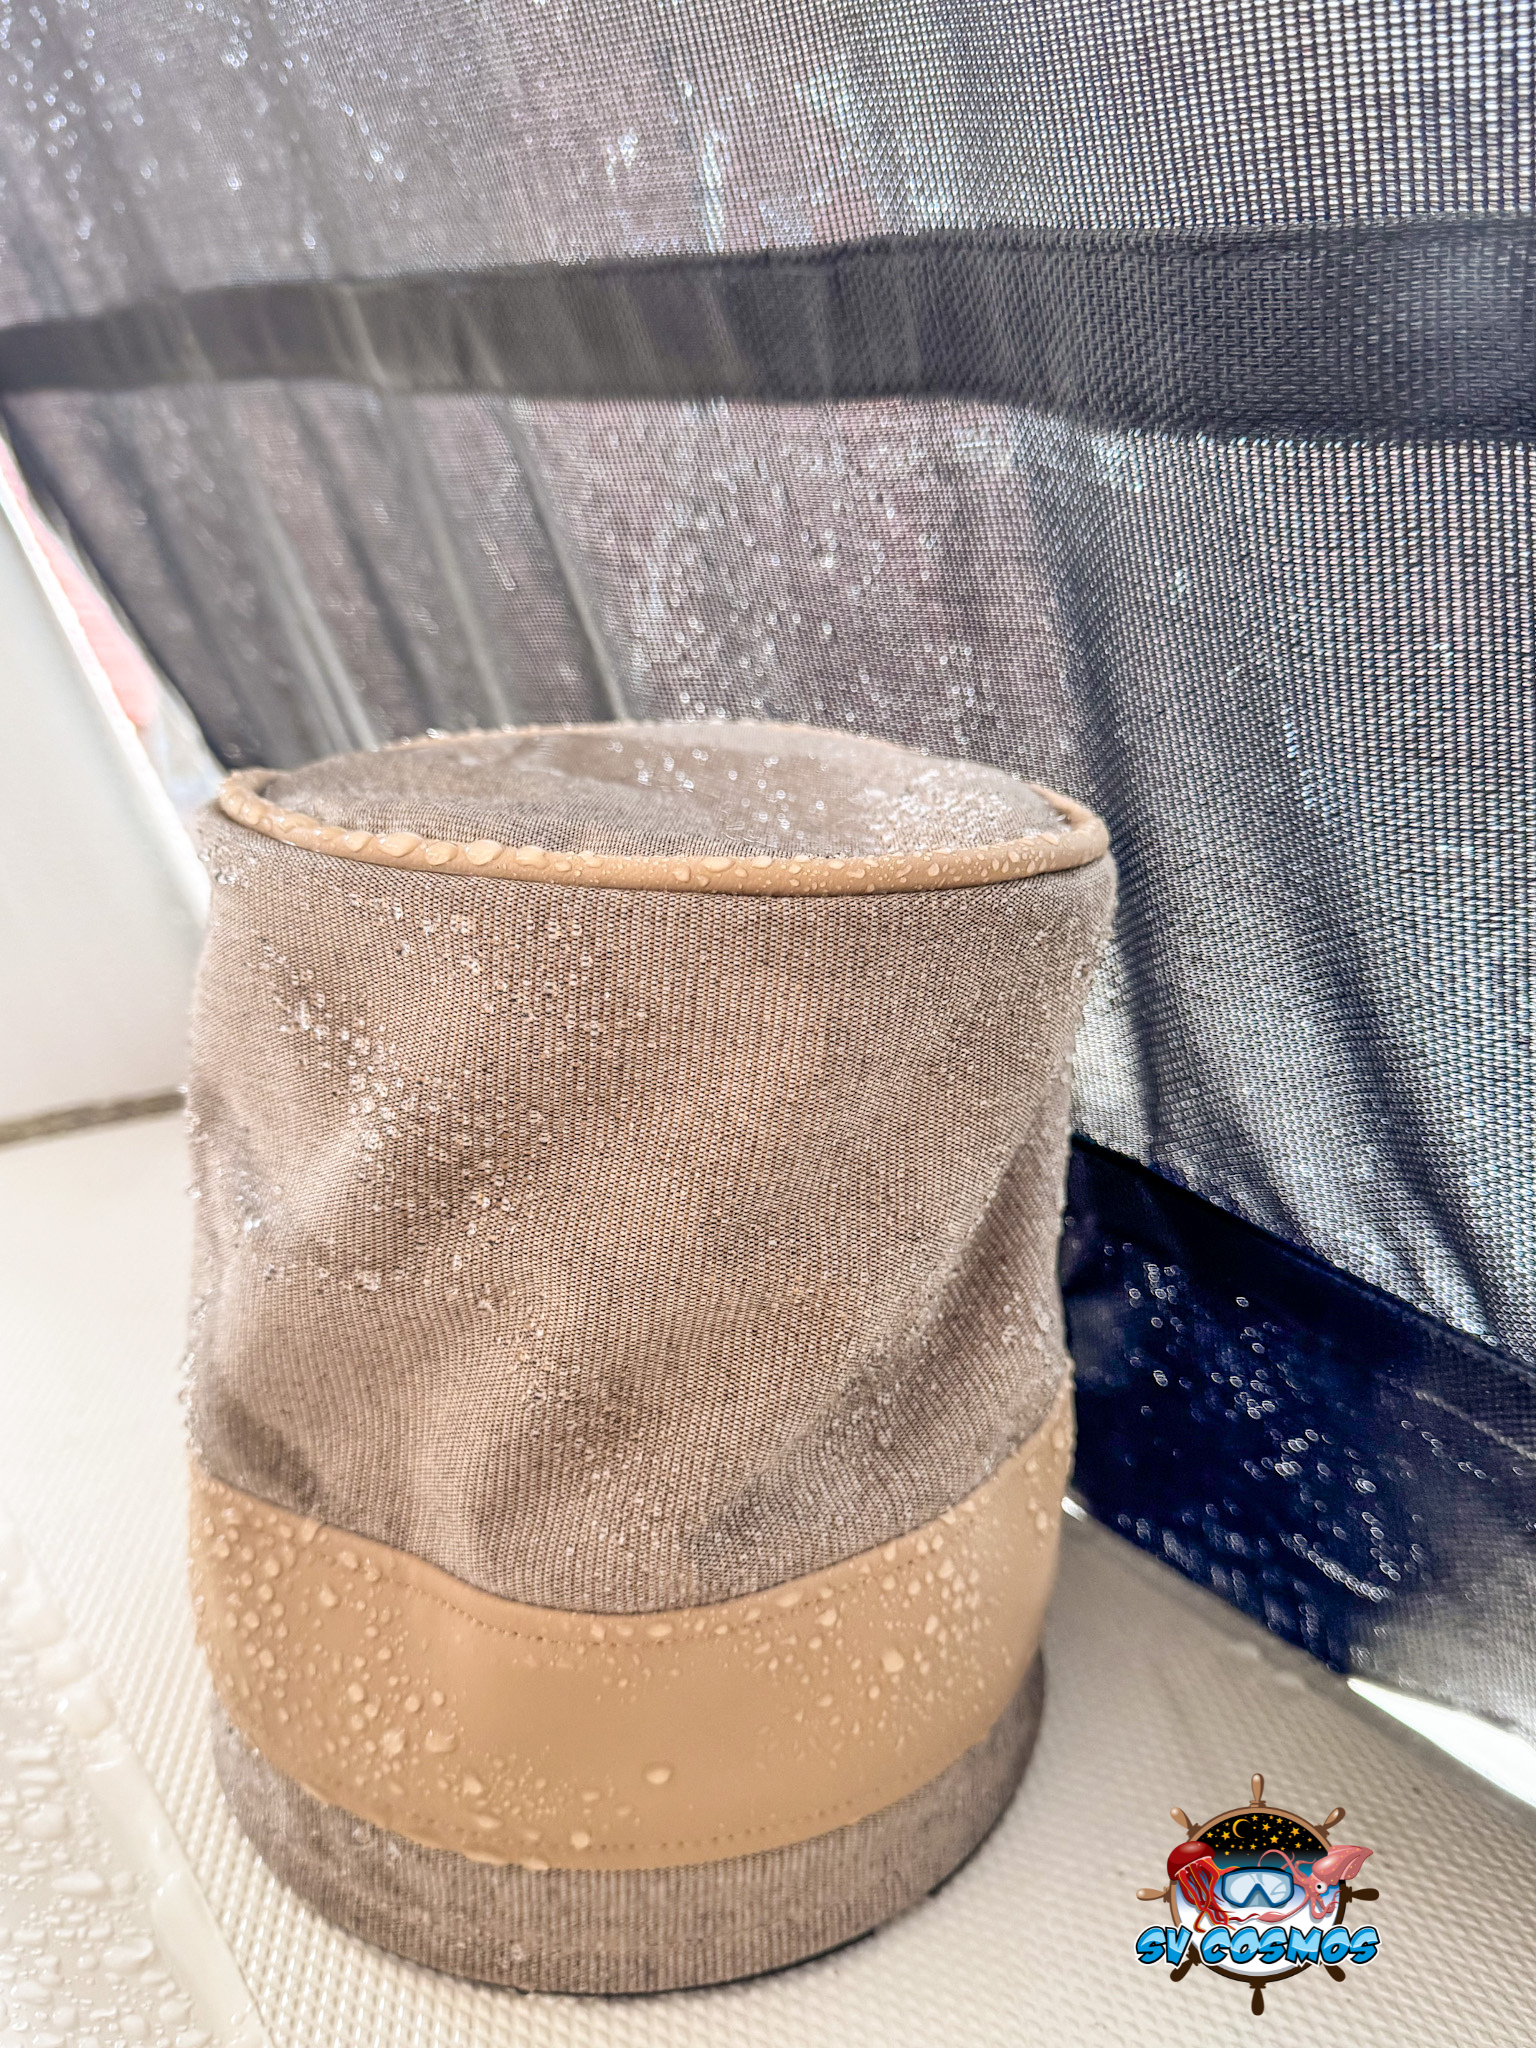
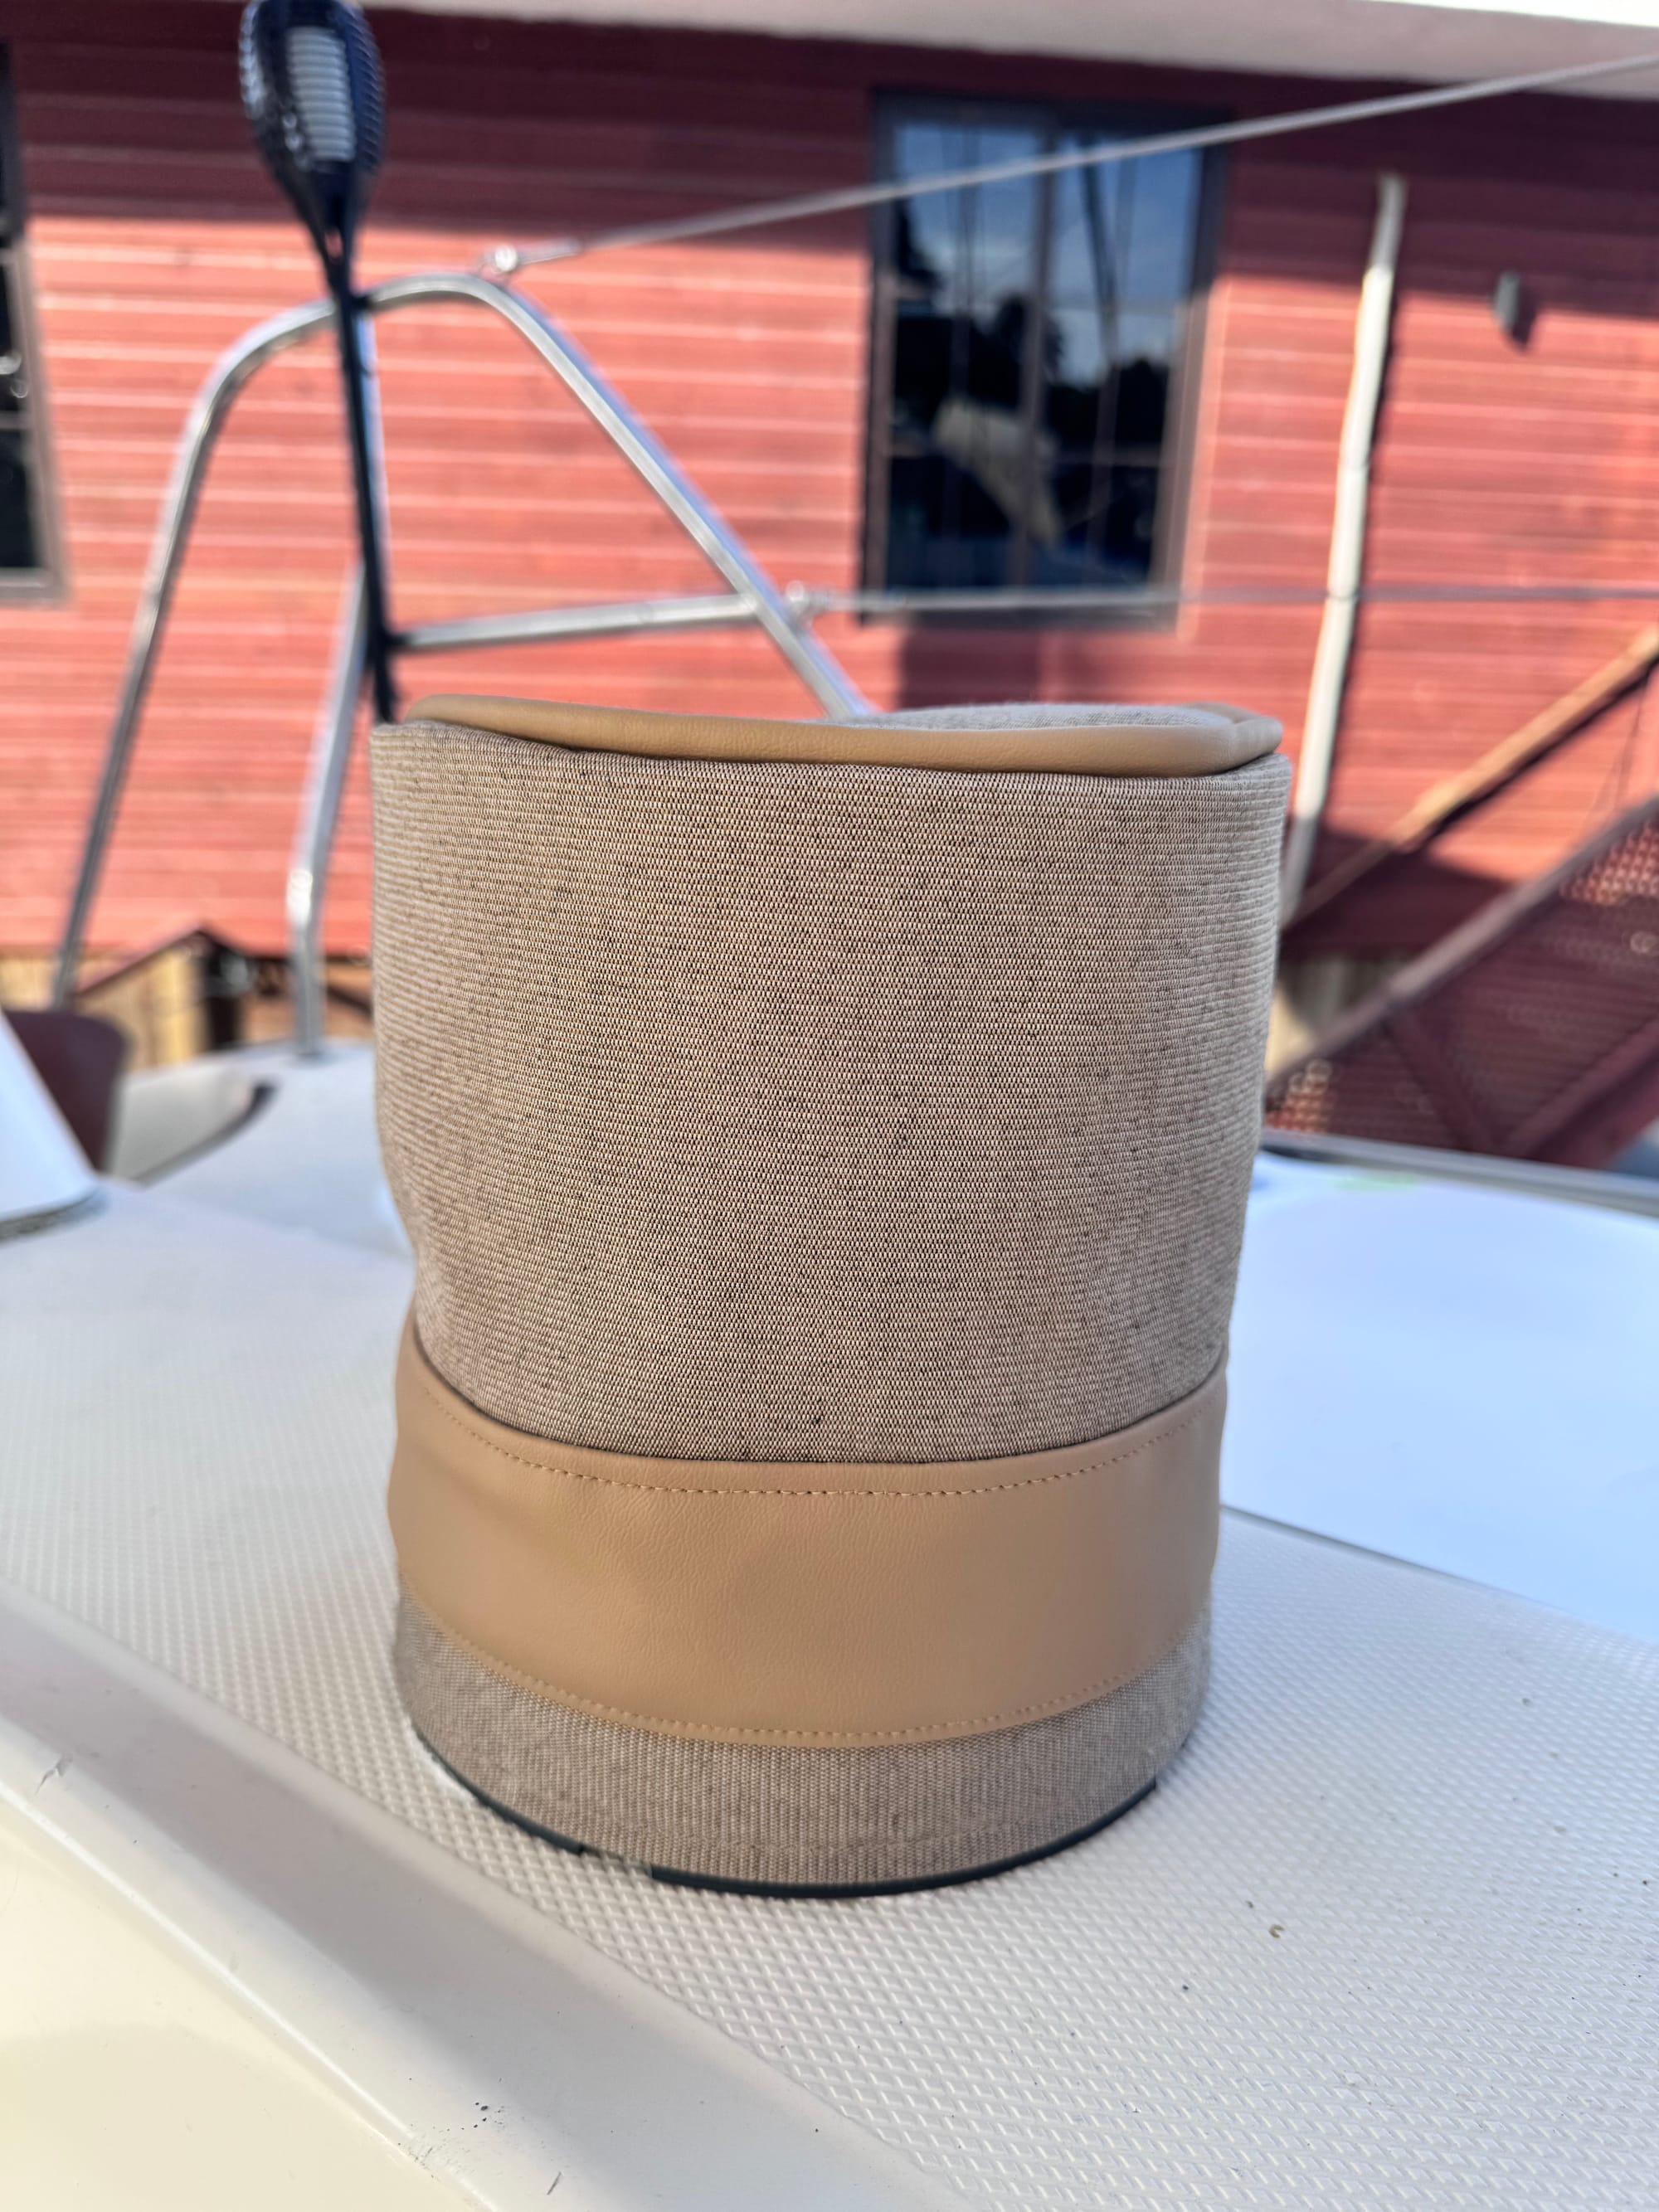
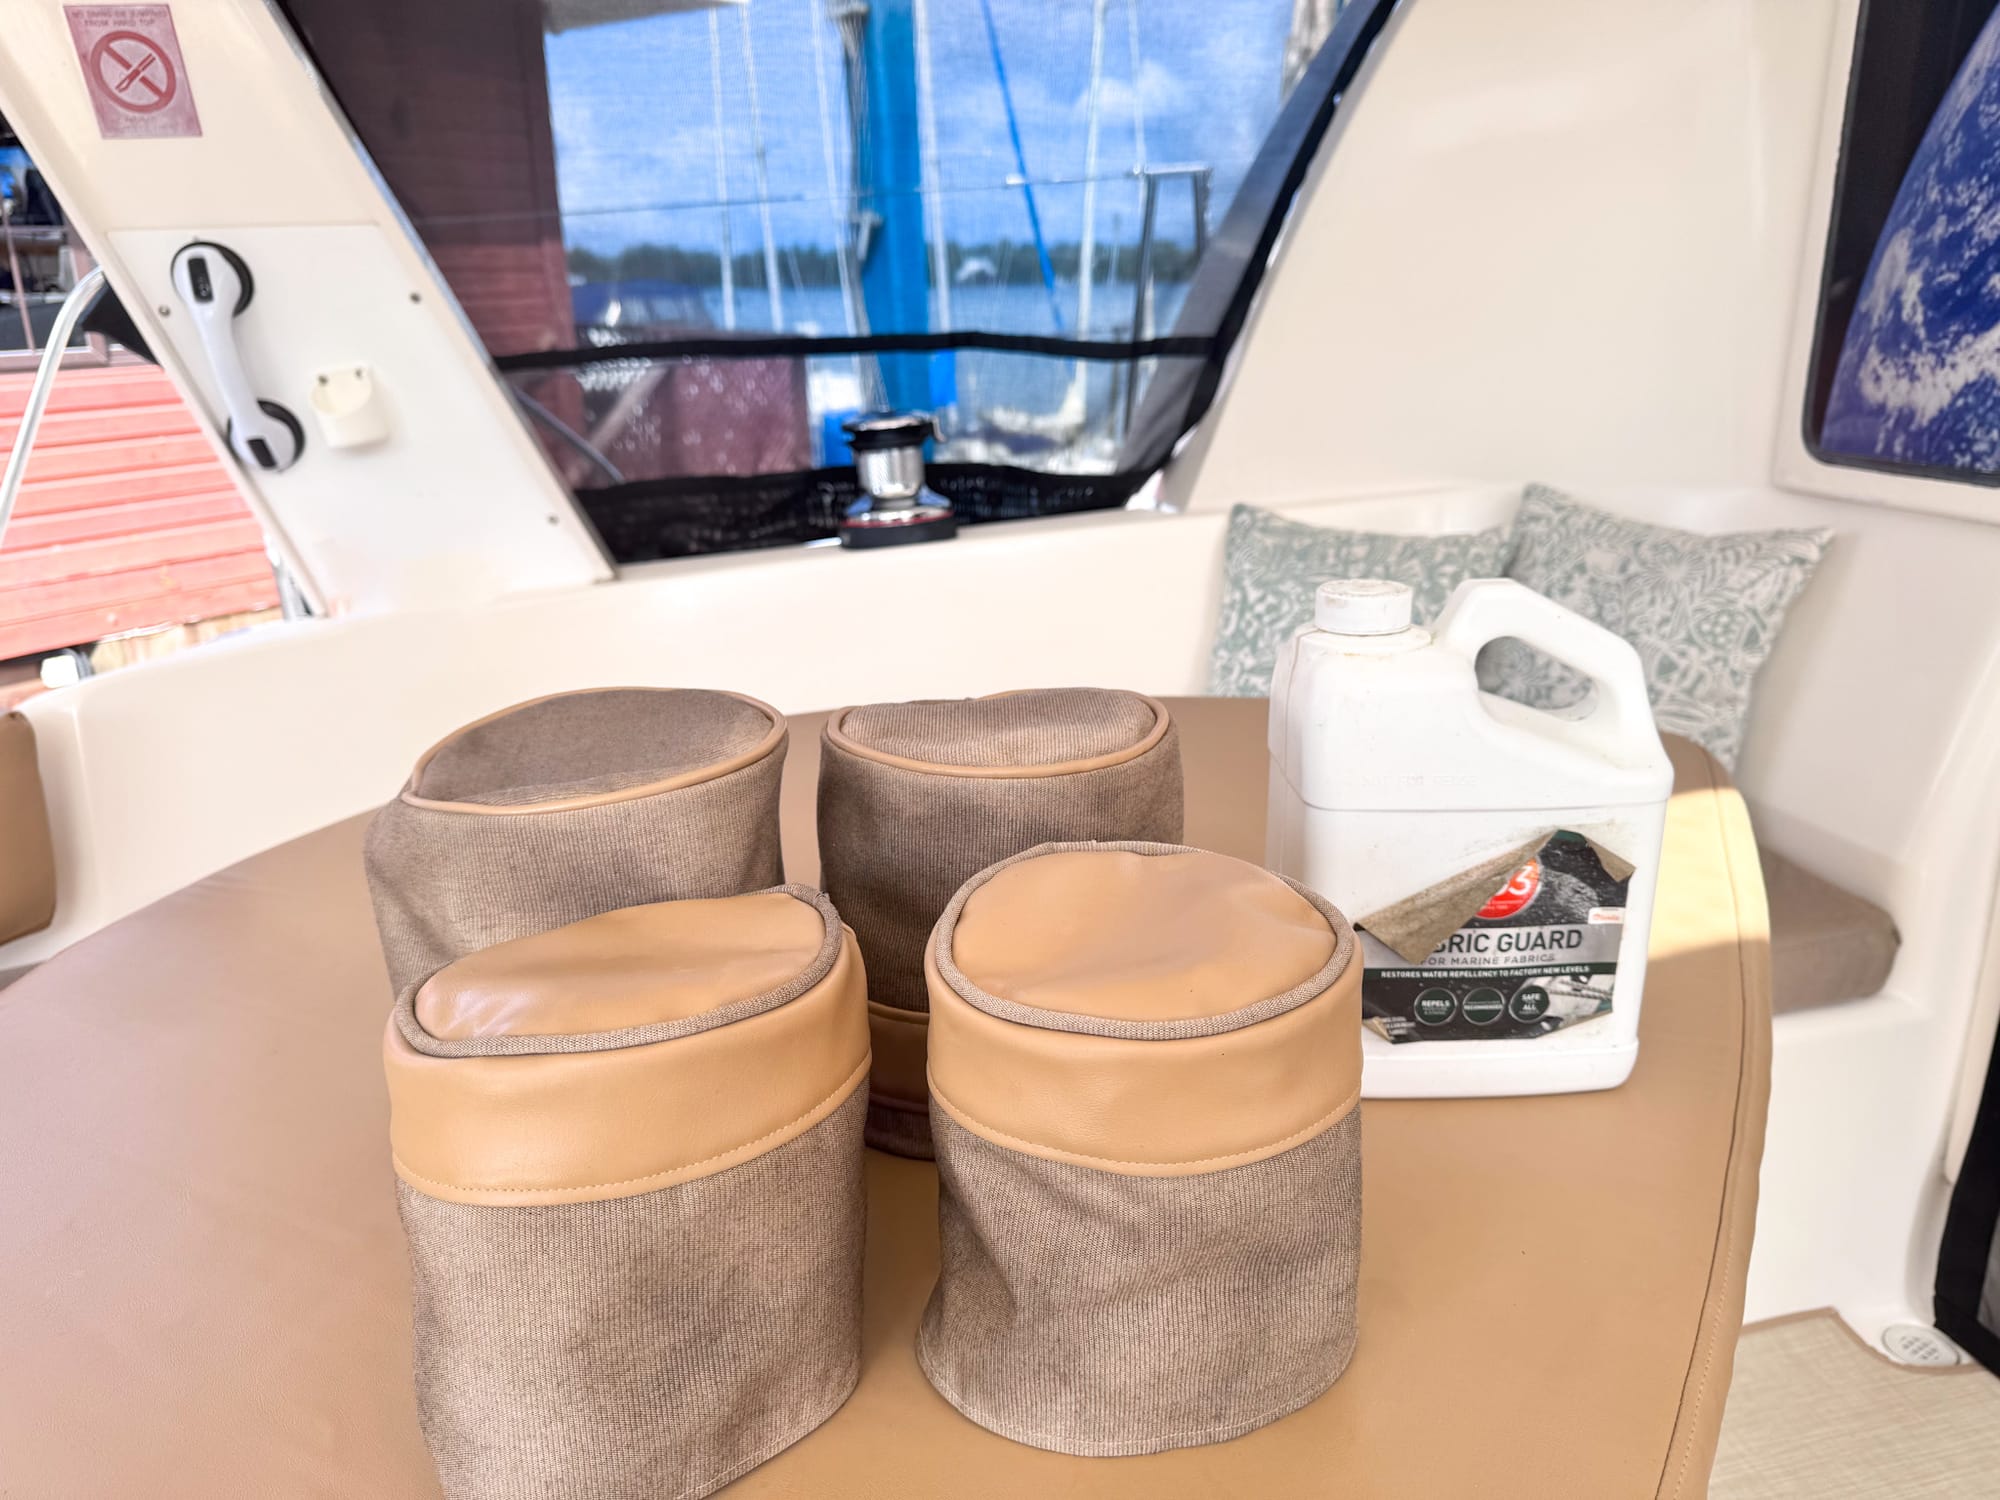
These challenges helped me refine the process for a better fit! I wanted to perfect my design and make sure all the covers matched, so I decided to make two more for the Harken 46 STC.2 (same size) and two smaller ones for the Harken 40 STC.2 that are mounted on our mast. Before I knew it, I had turned my leftover scraps into five custom winch covers! Not bad for what was almost a pile of scraps!
Winch Cover Wisdom: Small Tweaks, Big Wins!
After my first attempt, I discovered a few tricks that made the process smoother and the fit even better:
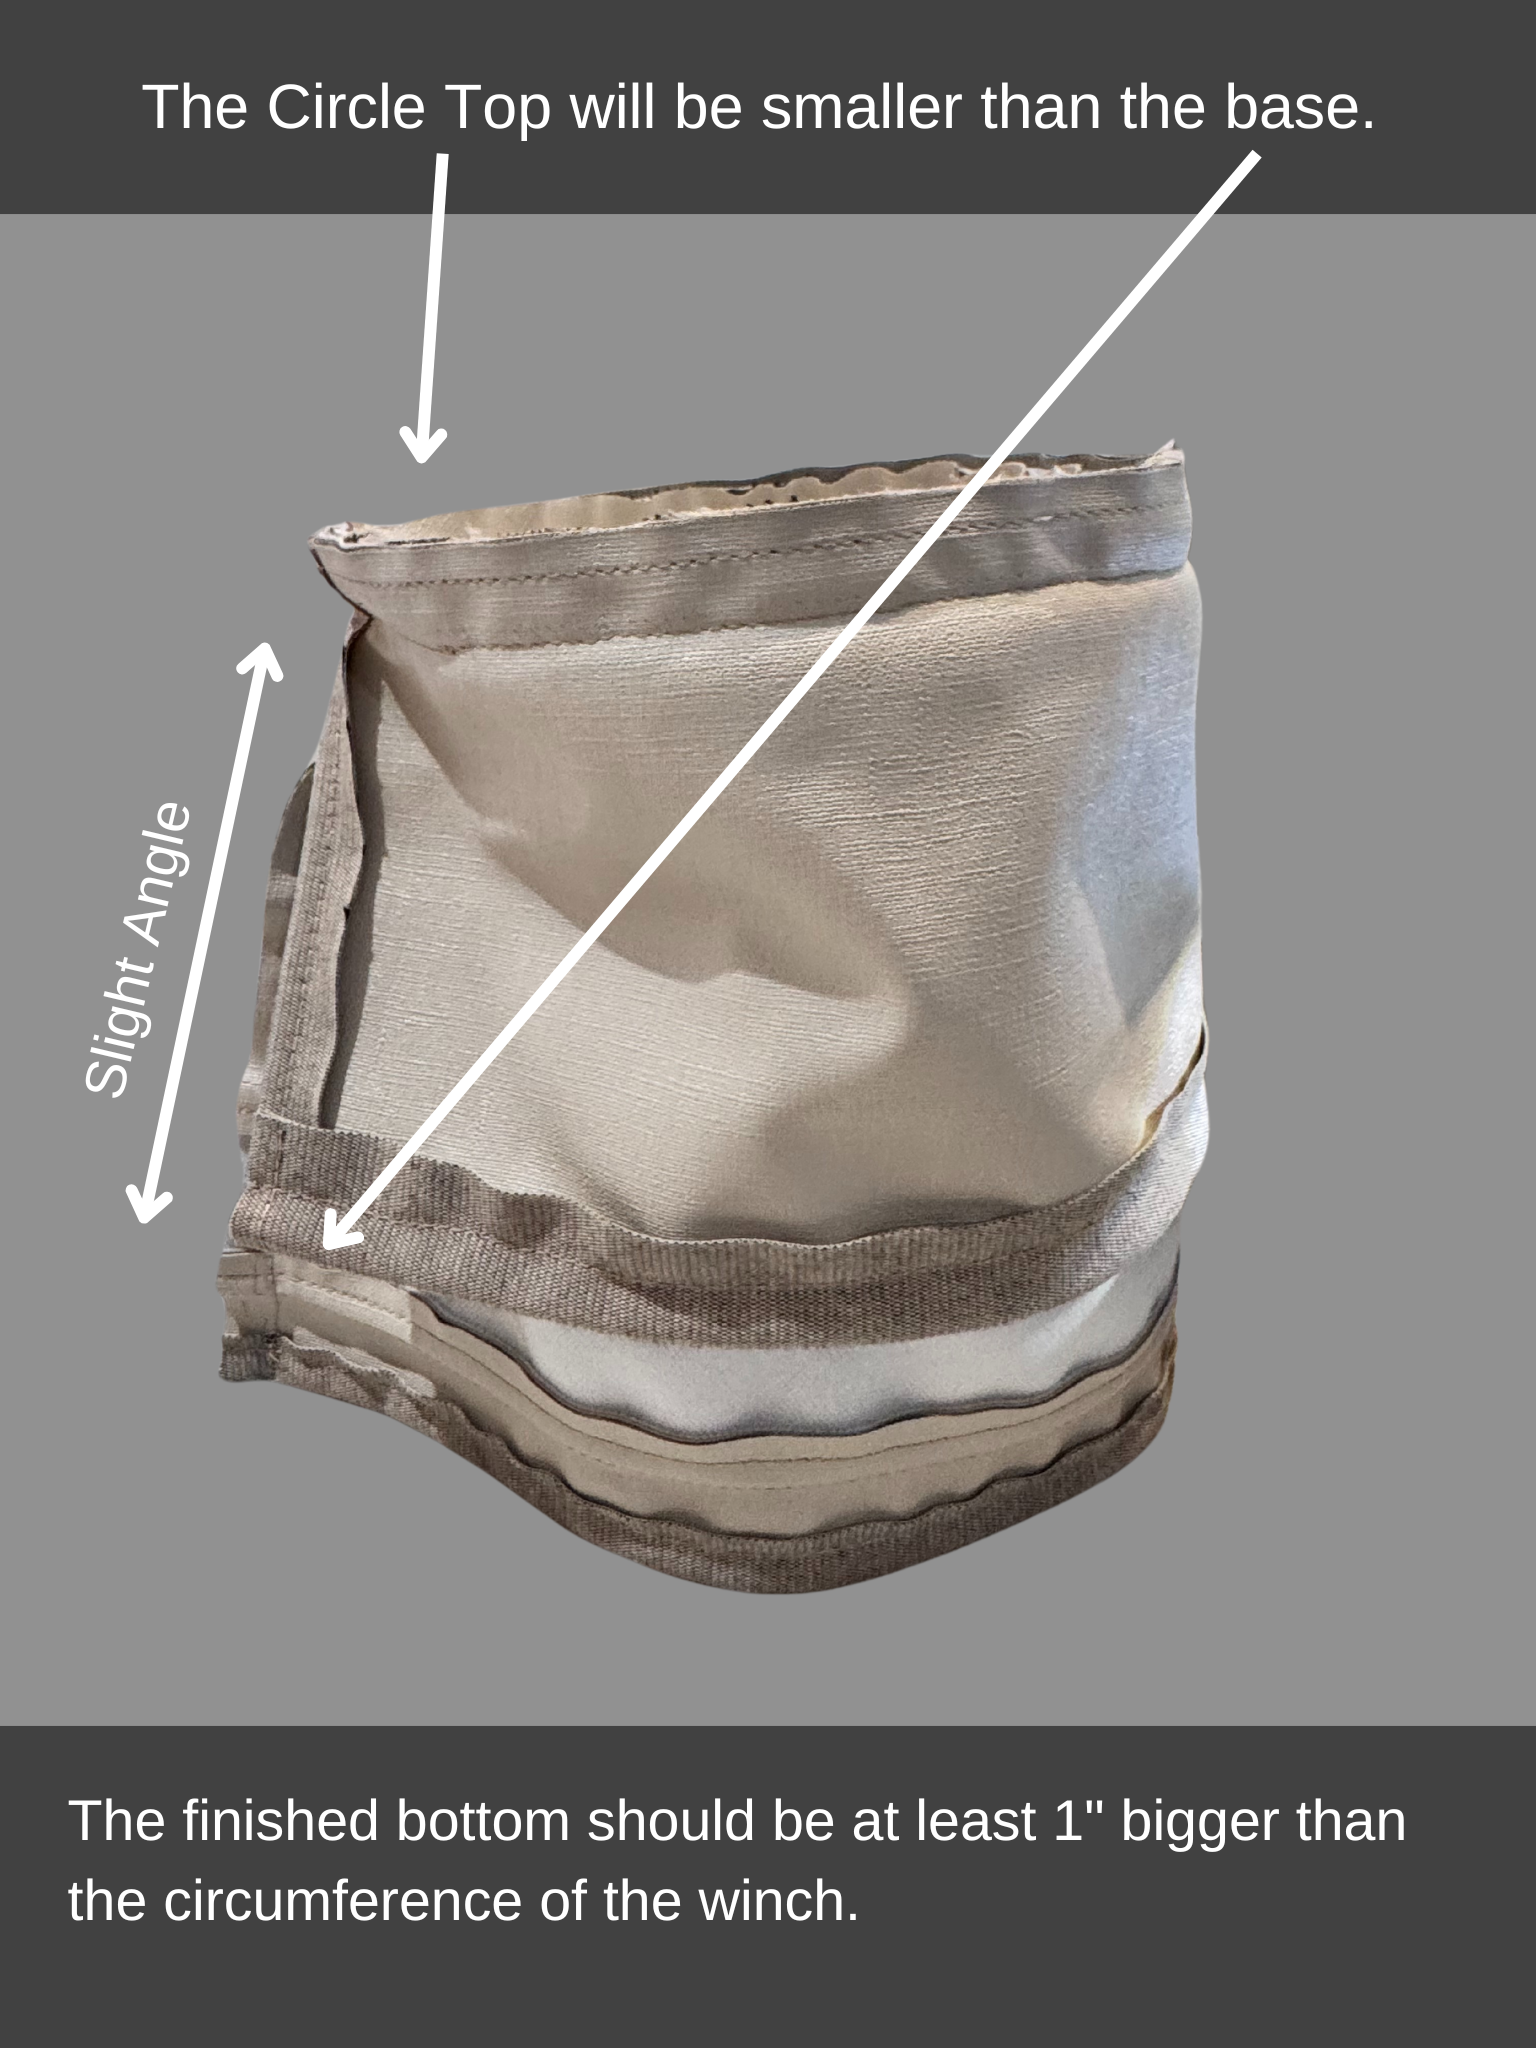
- Perfecting the fit. Since winches taper, I used the base circumference with a ½-inch seam allowance and angled the Sides slightly so the bottom ended up slightly larger than the top.
- A smarter sewing order. Instead of sewing the Side piece into a tube first, I didn't sew the sides and left a few inches open while attaching the Circle Top. Then, I stitched the Side at a slight angle before finishing the Circle Top - no more puckered seams!
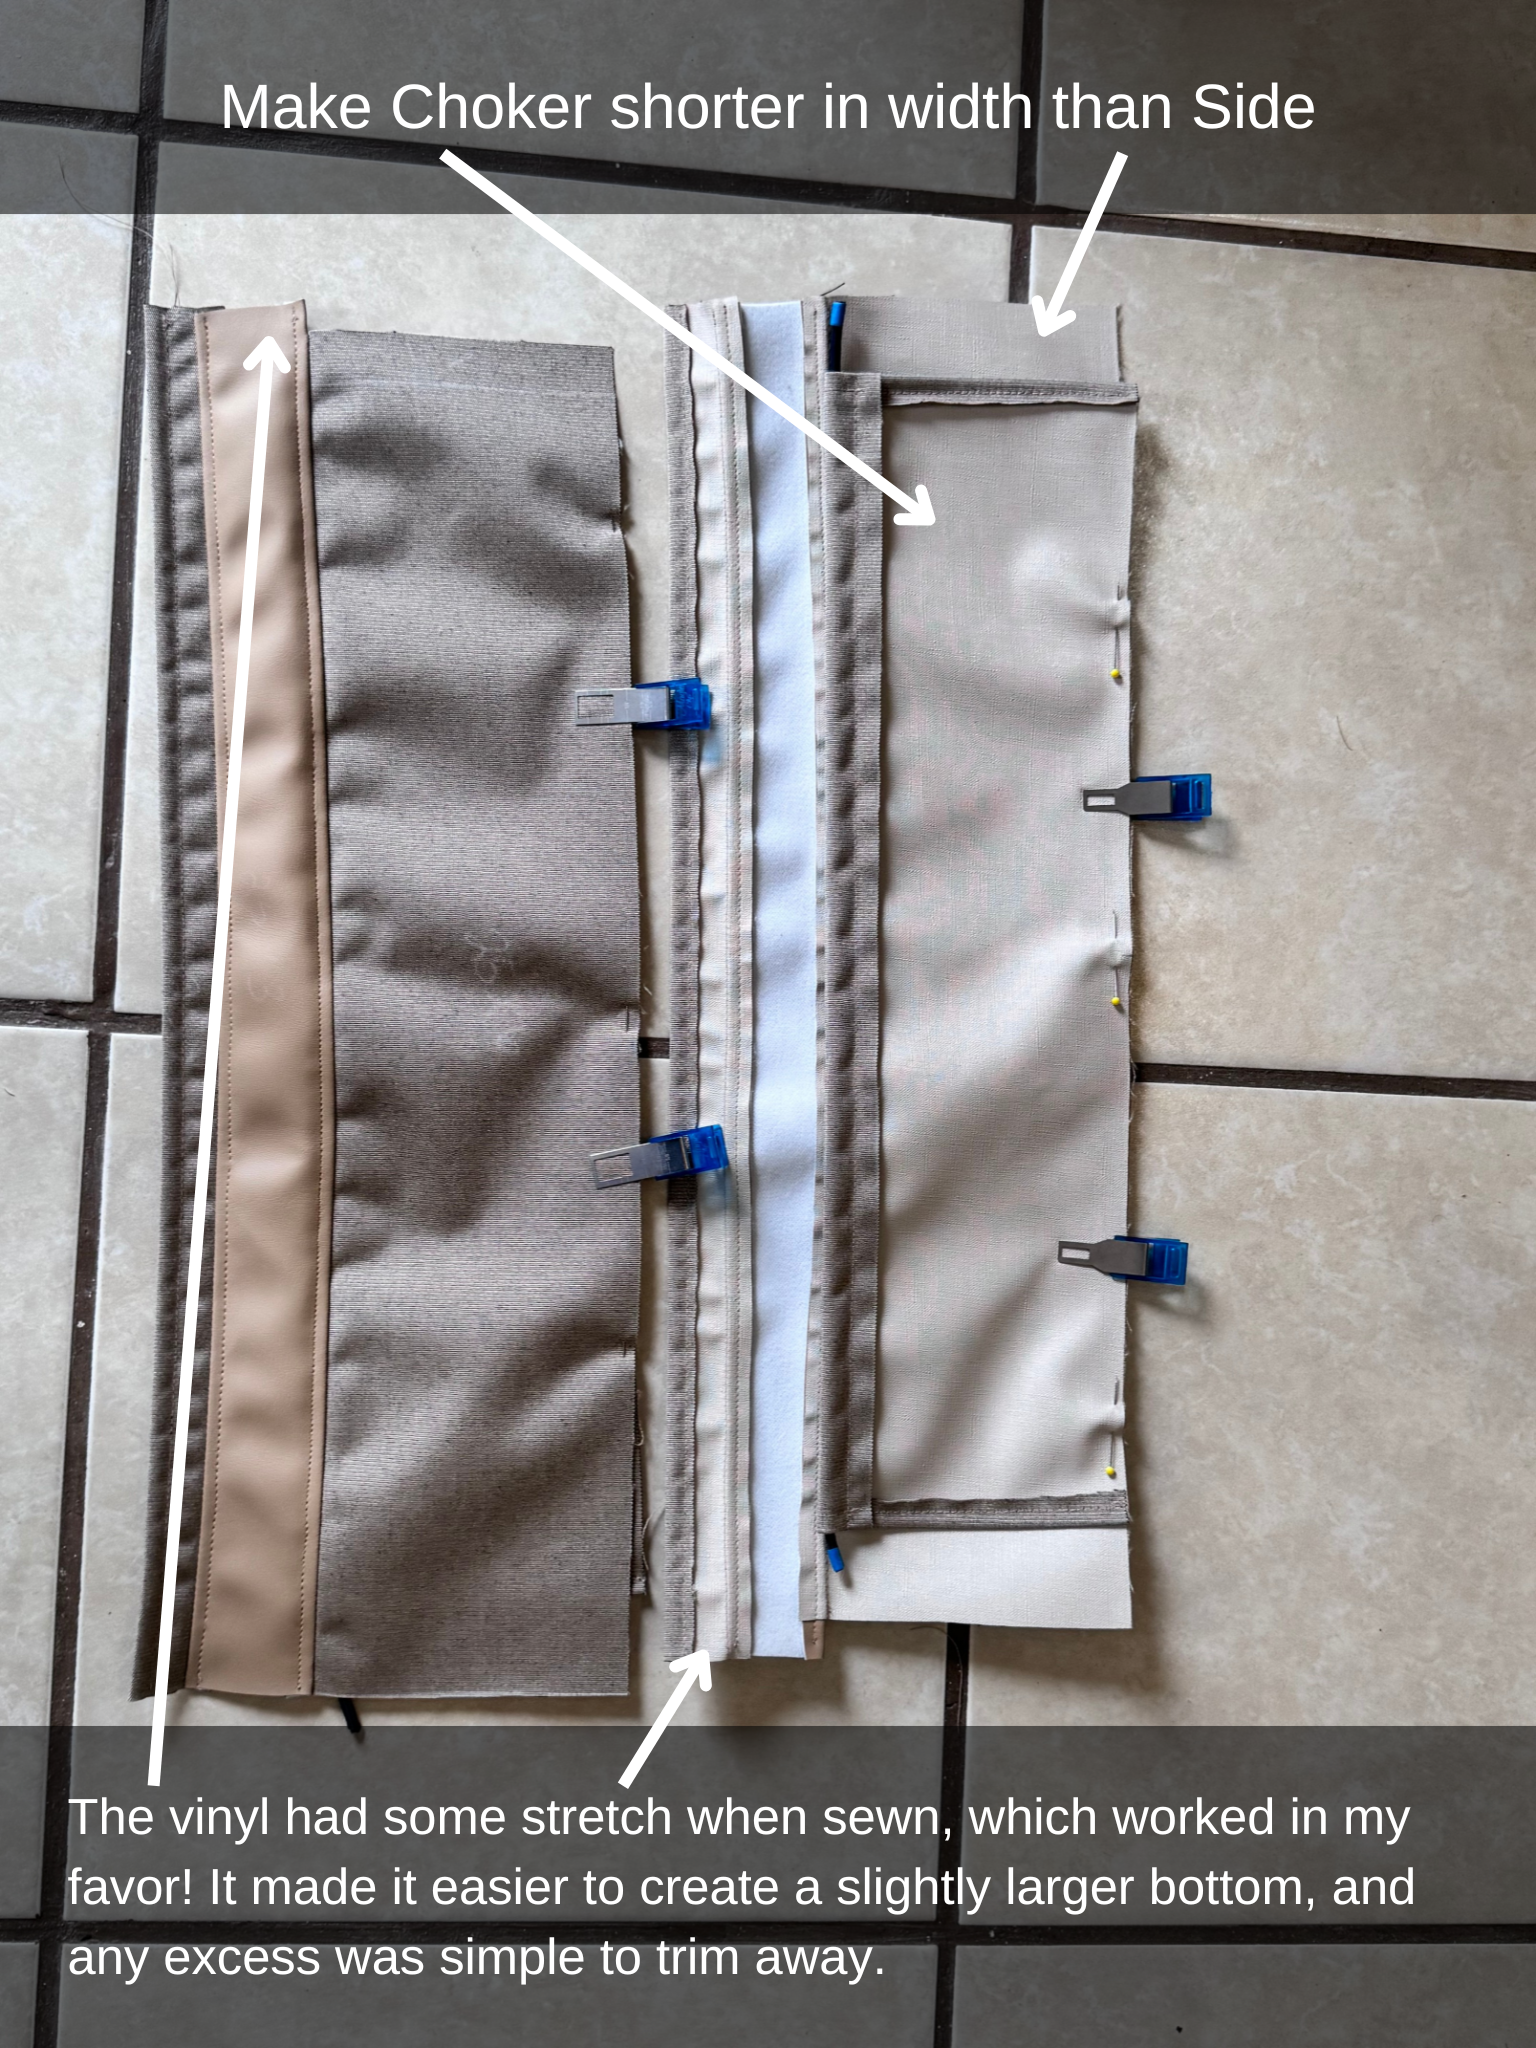
- Less bulk, easier sewing. Making the Choker a few inches less wide than the Side prevented the seams from overlapping, making it much easier to sew the Circle Top on.
- A better way to handle shock cord. Instead of trying to sew the shock cord with my sewing machine, I simply tied the ends together - quick, easy, and just as effective!
- Hot knife hack. Wrapping painter’s tape around the shock cord before cutting with a hot knife helped keep everything neat and tidy.
- Sealing for waterproofing. Using heat-sealing tape ensured extra durability for waterproof materials.
These small adjustments made a huge difference!
This tutorial walks you through my modified process to create a winch cover that fits just right.
Supplies
- Fabric of choice: I used scraps of Sunbrella Sea Mark in Toast Tweed and Sunbrella Horizon Capriccio. Note: Mix and match scraps that you have to make a fun design.
- Cording I prefer making my own cording by cutting 1 ¾” pieces on a 45° angle for bias strips and sewing in the cording. (Avoid cutting on the bias if using striped fabric or Sunbrella Horizon.)

- If you don't have any leftover fabric from other projects, Sailrite offers a Winch Cover Kit that includes the materials you need to make several winch covers.
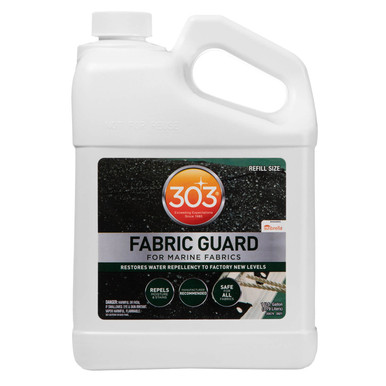
- 303 Fabric Guard in spray bottle or Gallon size
Recommended Tools

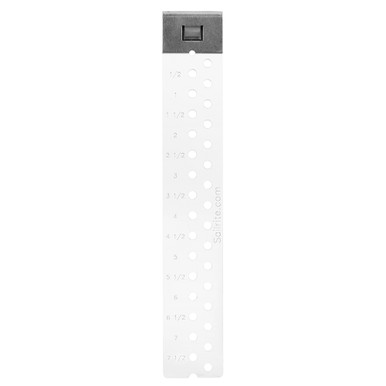
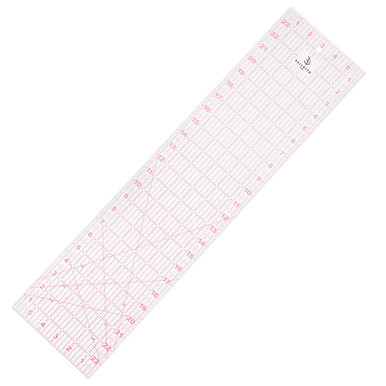
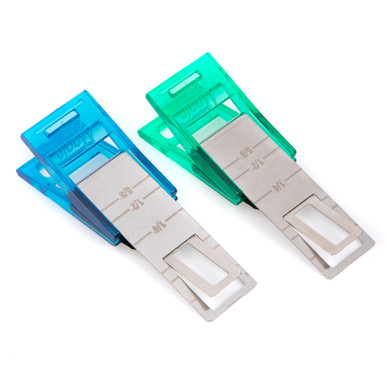
Fabric Circle Cutter or Canvas Patterning Ruler and Awl
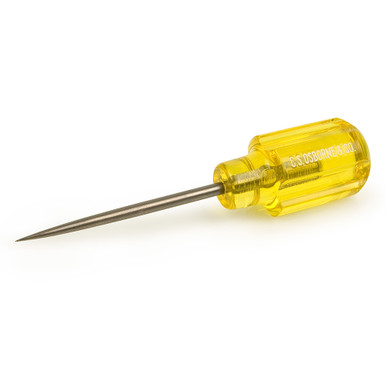

Pencil
View all my favorite sewing supplies on Amazon and Sailrite.
Amazon offers competitive prices and fast shipping, especially if you are an Amazon Prime member. If you don't already have a Prime membership, you can try it for free for 3 months here. Sailrite may have lower prices, but they typically charge for shipping unless you catch a sale. Sign up for their newsletter to stay informed about upcoming sales.
Pattern
SAJGA FREE WINCH COVER PATTERN WITH INSIDE CHOKER
Step 1: Measurements
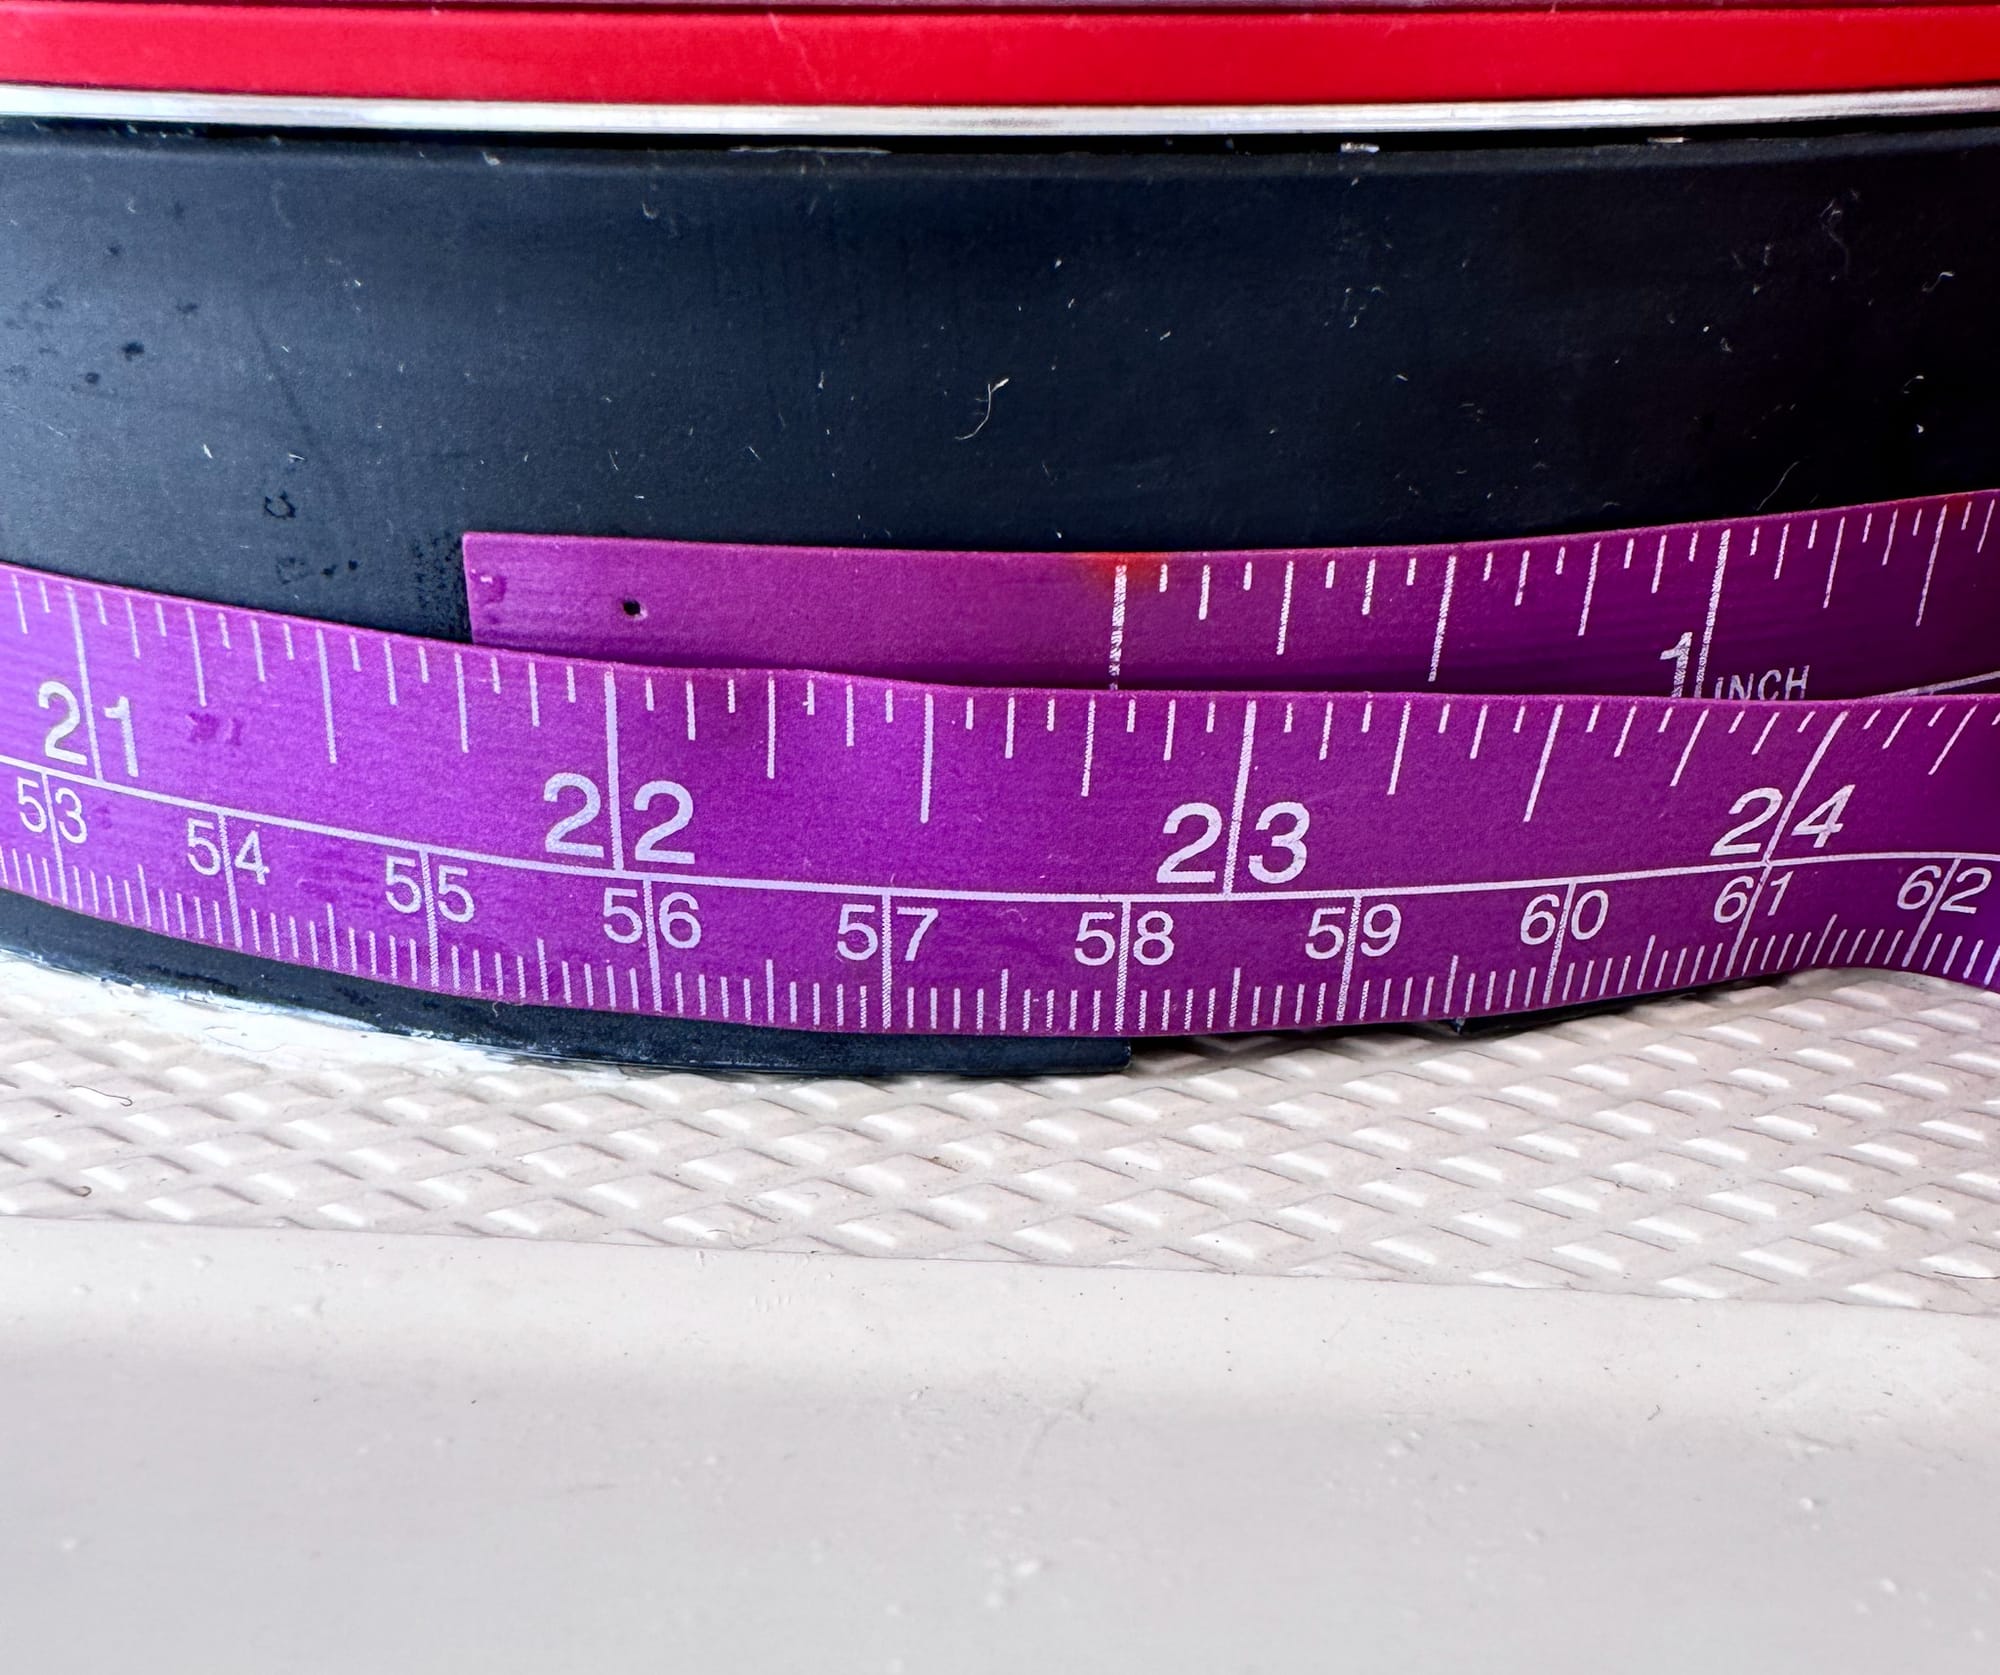
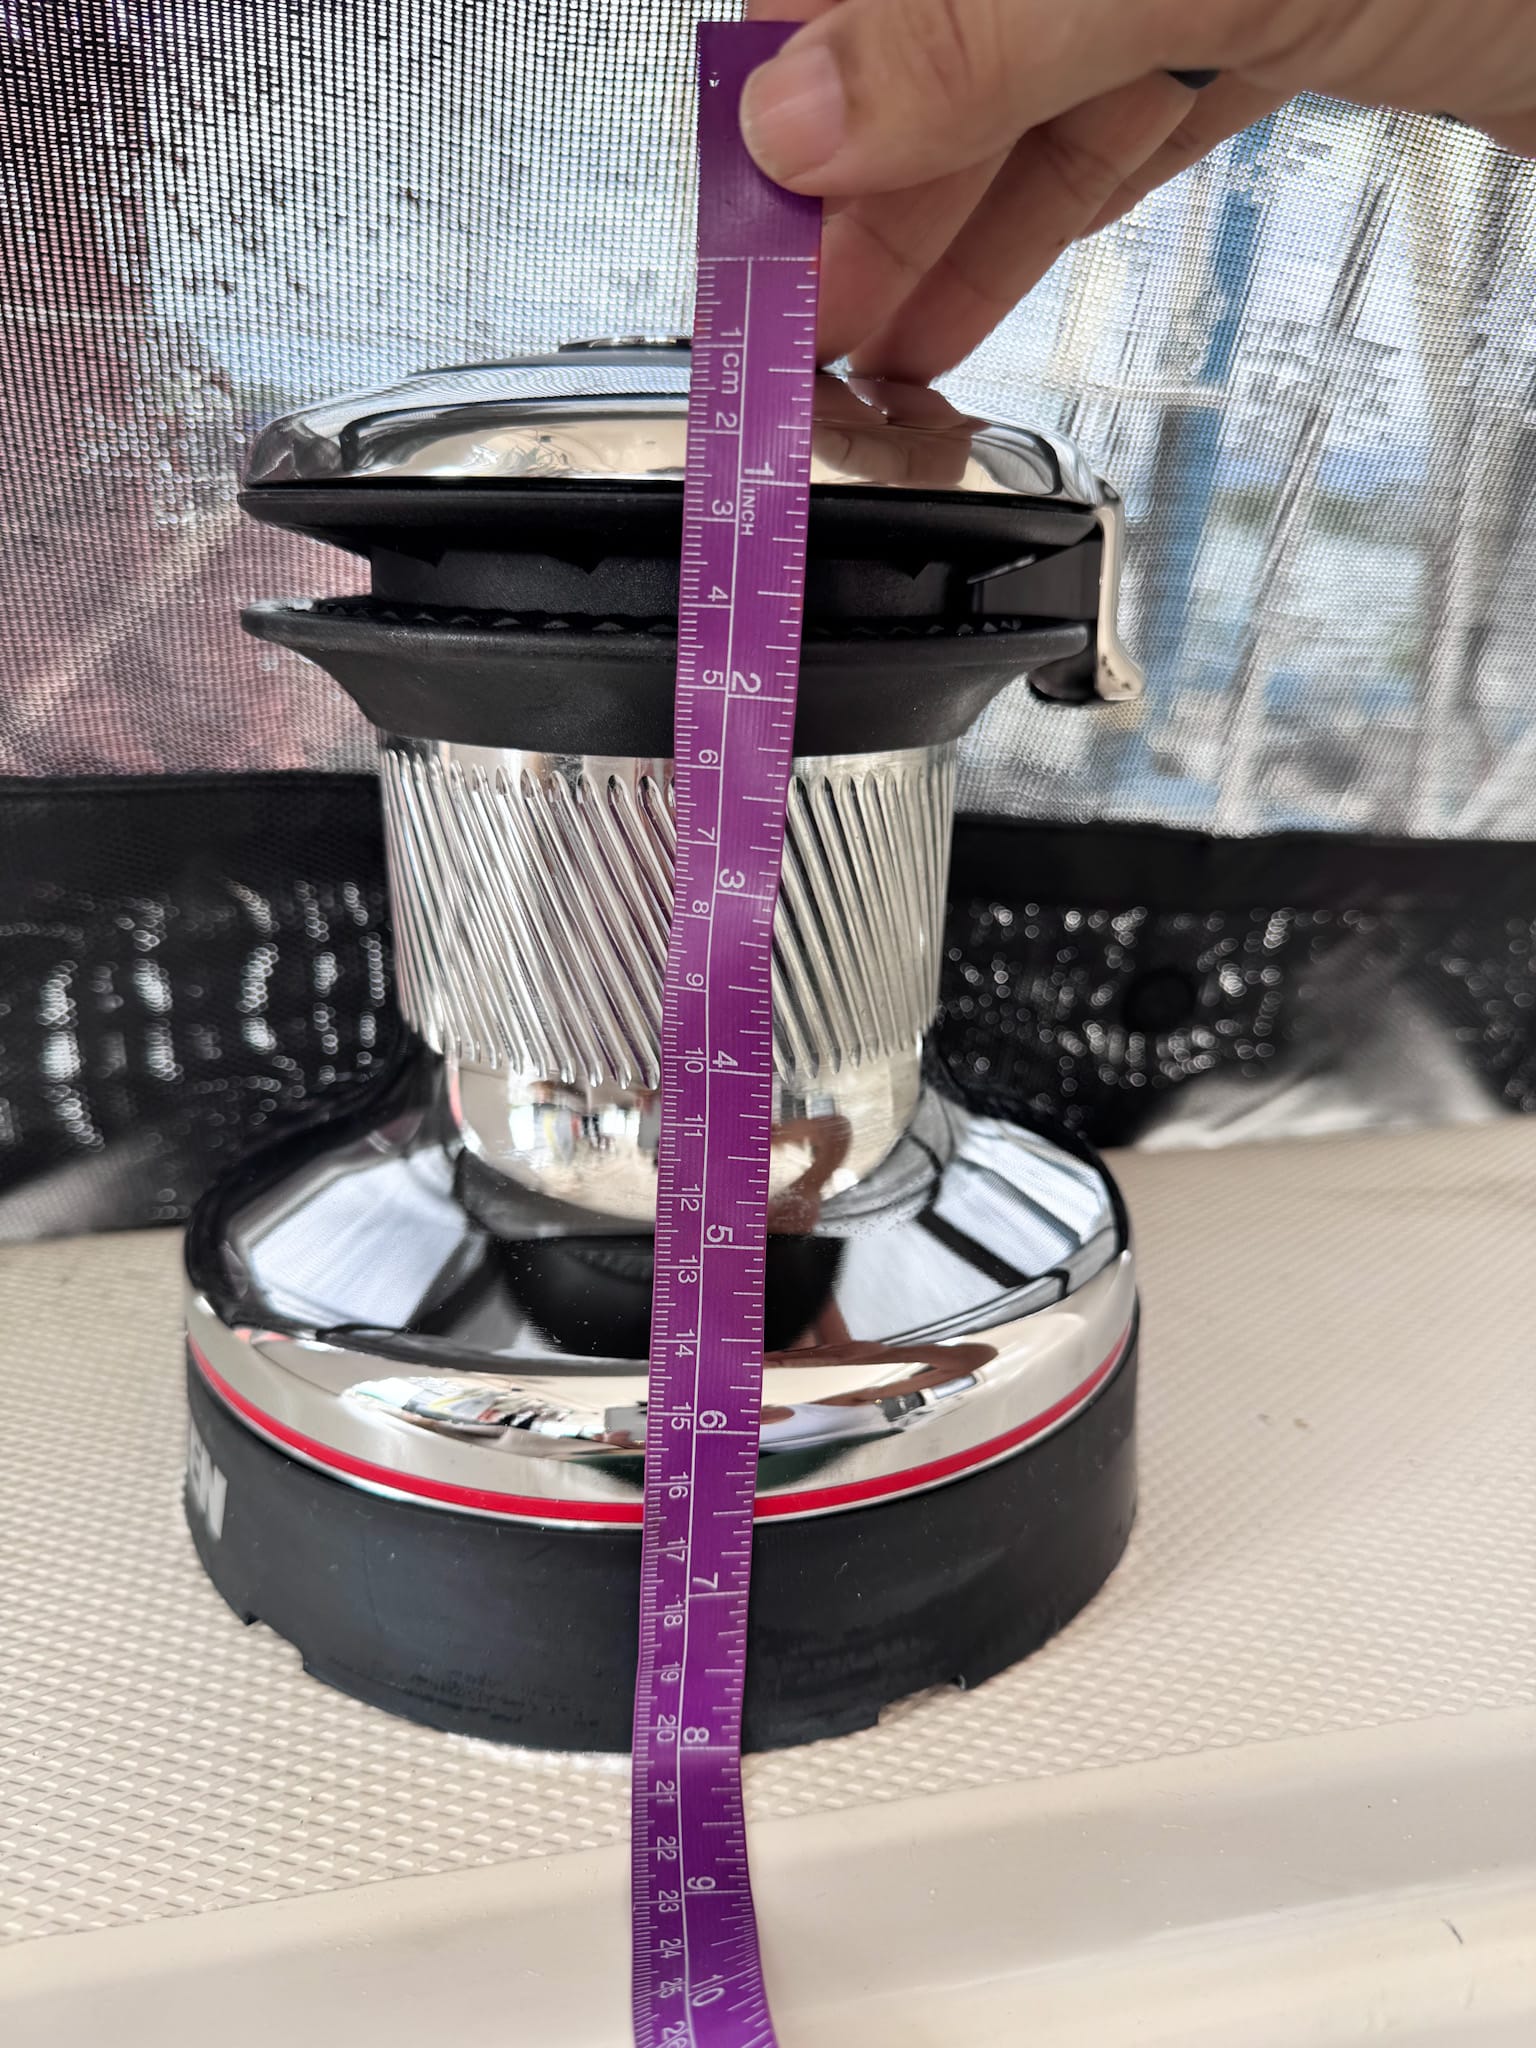
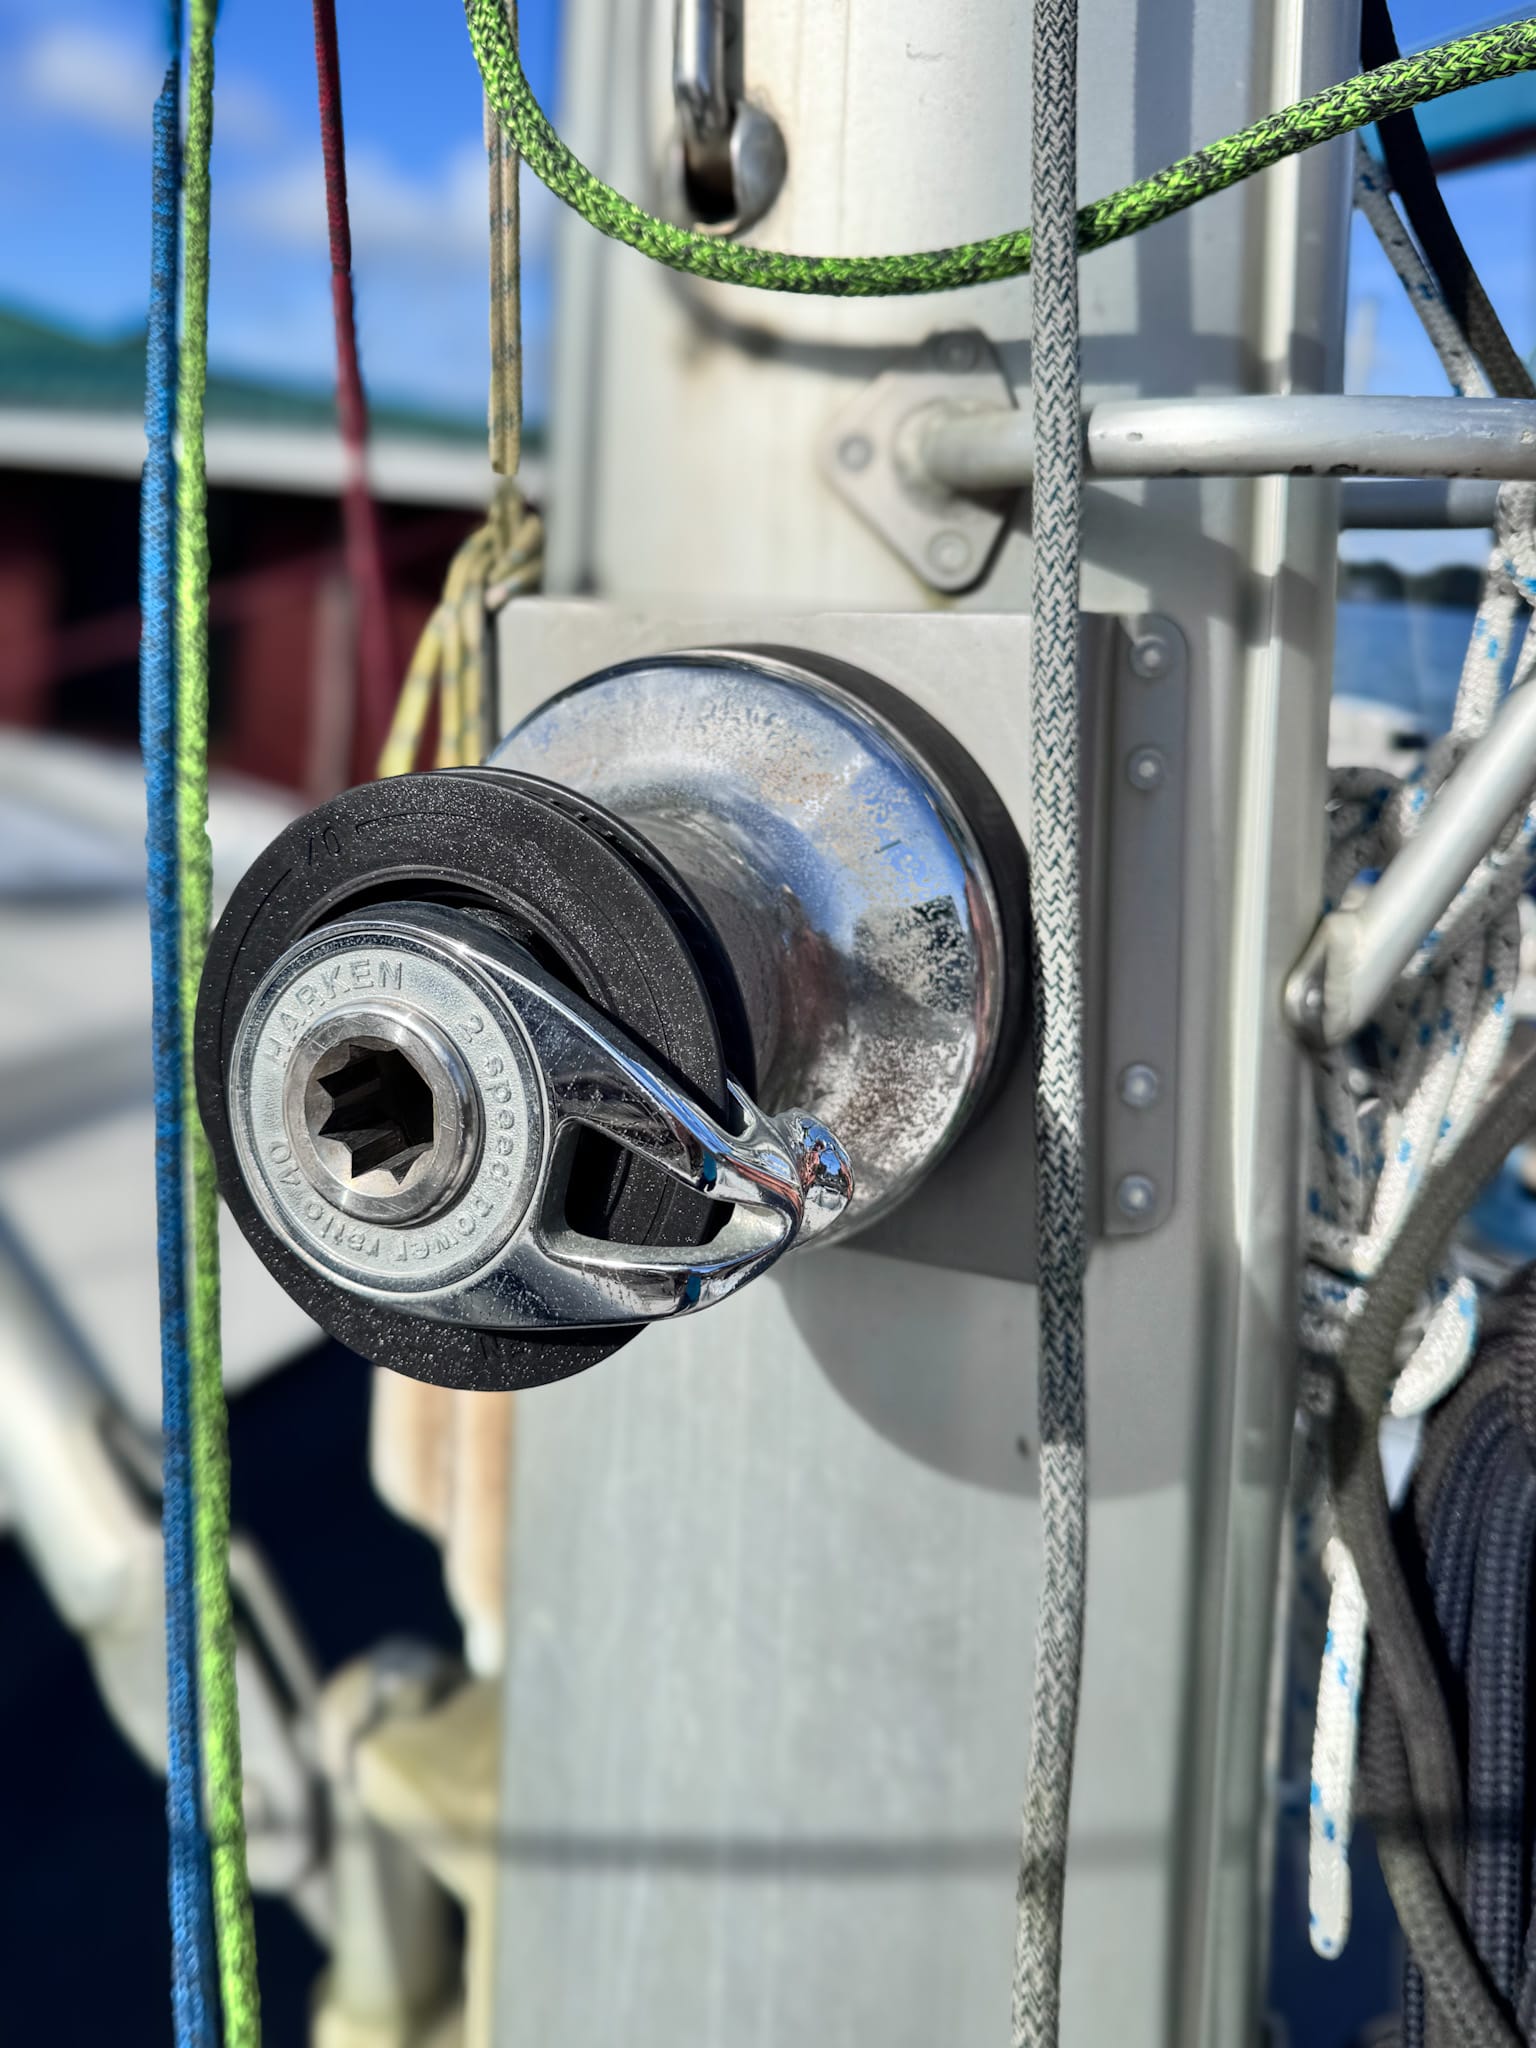
Using an example winch with a 22.75” circumference and 8” height:
- Measure the circumference of the bottom of the winch = 22.75”
- Measure the height = 8”
- The top of the winch is 6” (but this measurement isn’t necessary since it’s smaller than the base).
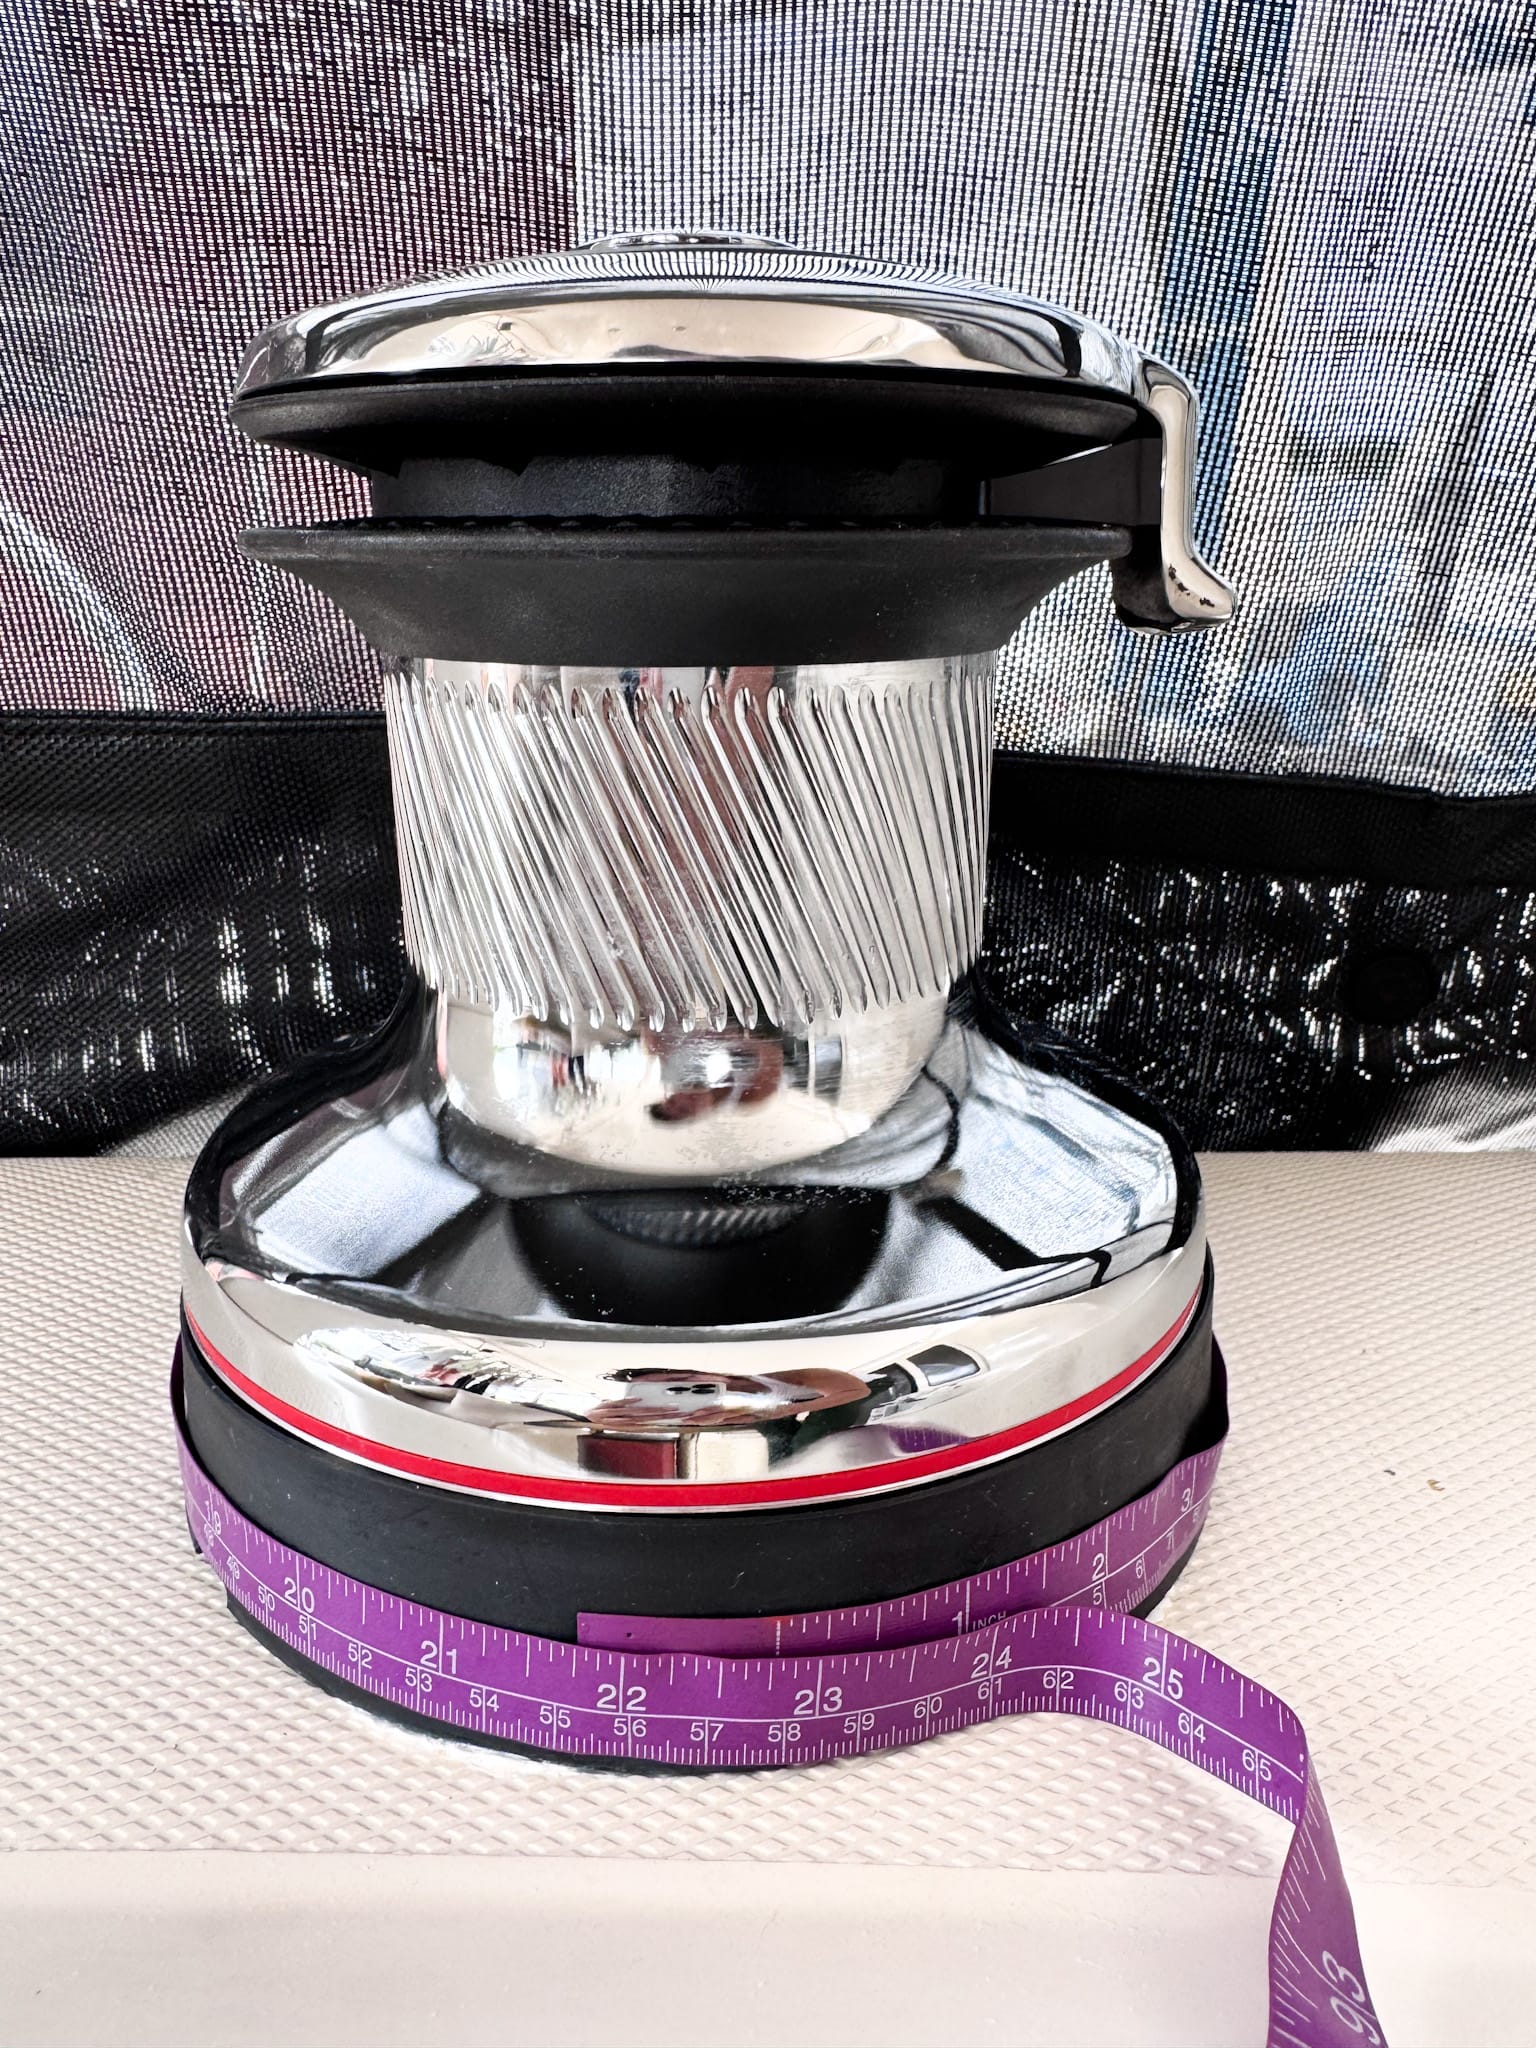
You only need to measure the base and height since the top of the winch is smaller than the base.
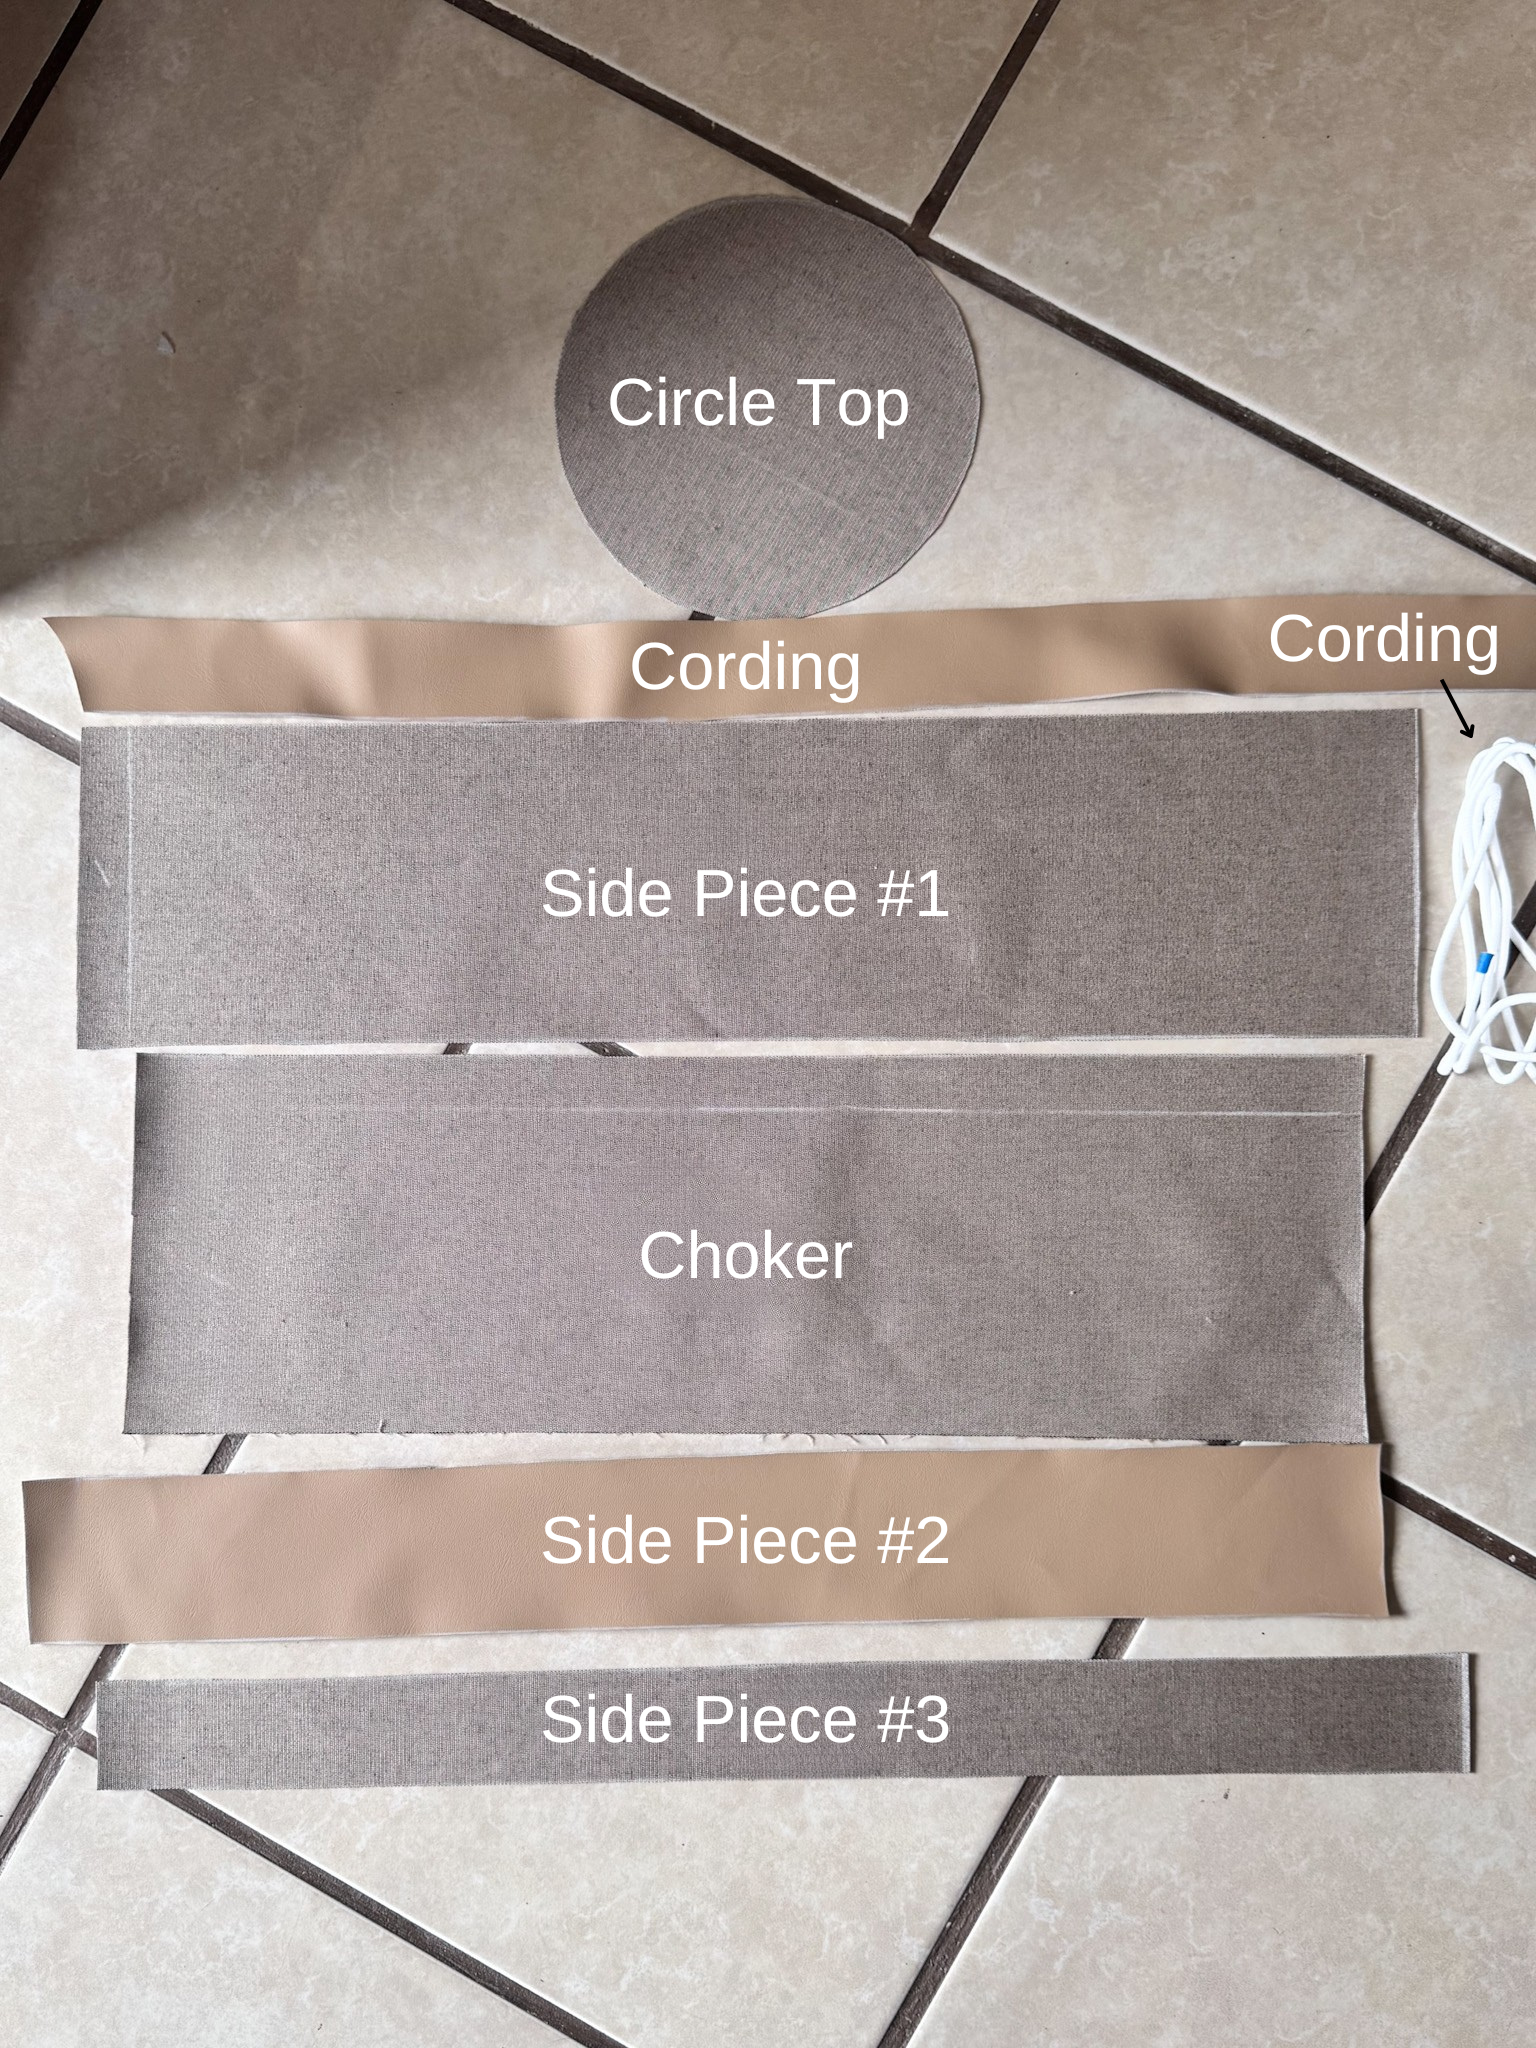
Step 2: Cutting Fabric
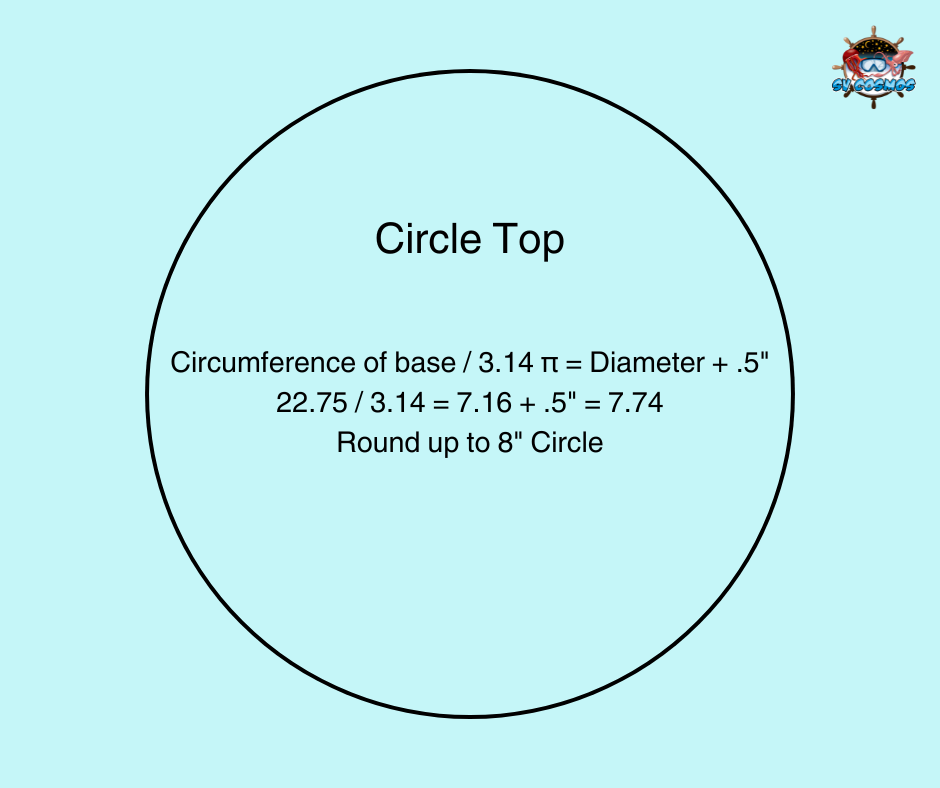
A. Top Circle Fabric
- Calculate Diameter:
- 22.75” circumference ÷ π (3.14) = 7.24” (size of the circle)
- Add 0.5” seam allowance = 7.74”
- Cut an 8” circle
B. Cording Length
- Formula: Circle size 8” x π (3.14) = 25.14” (plus a few extra inches)
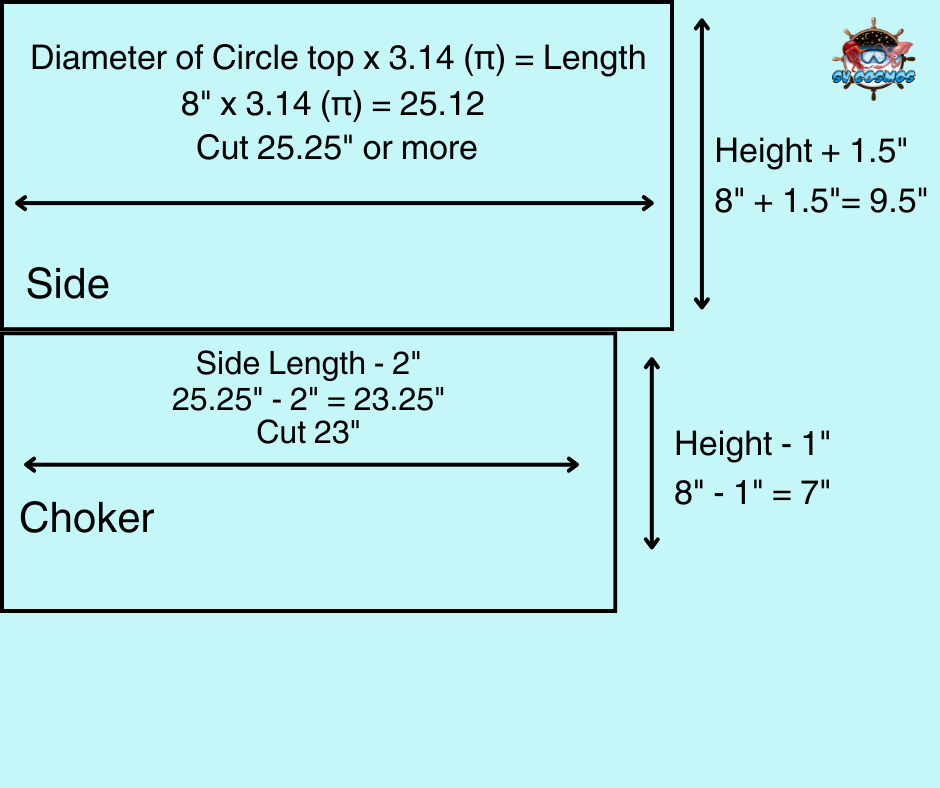
C. Side Fabric
- Height: 8” + 0.5” (top seam allowance) + 1” (bottom hem) = 9.5”
- Width: 8” circle x π (3.14) = 25.14” (or more for a slightly looser fit around the base). The finished circle will be 7.5", so using 8" in the formula adds a bit of extra allowance for a better fit. Note: For a snug fit, you will want to make sure your bottom is 1" wider than the circumference of the base. For a slightly looser fit, add 1/2" to this measurement.
- If sewing multiple pieces together, add .5” for seam allowance for each piece on top and bottom. For example if using 3 pieces - cut 6”, 3” & 2 1/2” with a ½” seam allowance and a bottom seam allowance of 1” this will result in 5” + 2” + 1” = 8” high
- Cut fabric: 25.25” wide x 9.5” high (When in doubt, I always add a little extra—it’s easier to trim than to come up short!) Note: Double-check your final height to ensure accuracy.
D. Choker Fabric
- Choker Height: Height of winch 8” - 1” = 7” Note: With a 0.5” seam allowance at the top and 1” at the bottom, the inside choker height will be 5.5”. Once the shock cord is tightened, it will shrink even more. If you don’t have a scrap that size, no worries—you can use a smaller piece or sew two pieces together. Since this choker is on the inside, it won’t be visible!
- Width: Side fabric width 25.25” - 2” = 23.25” (round down) Note: This should be less wide than your side fabric.
- Cut fabric: 23” wide x 7” high
Step 3: Sewing the Winch Cover
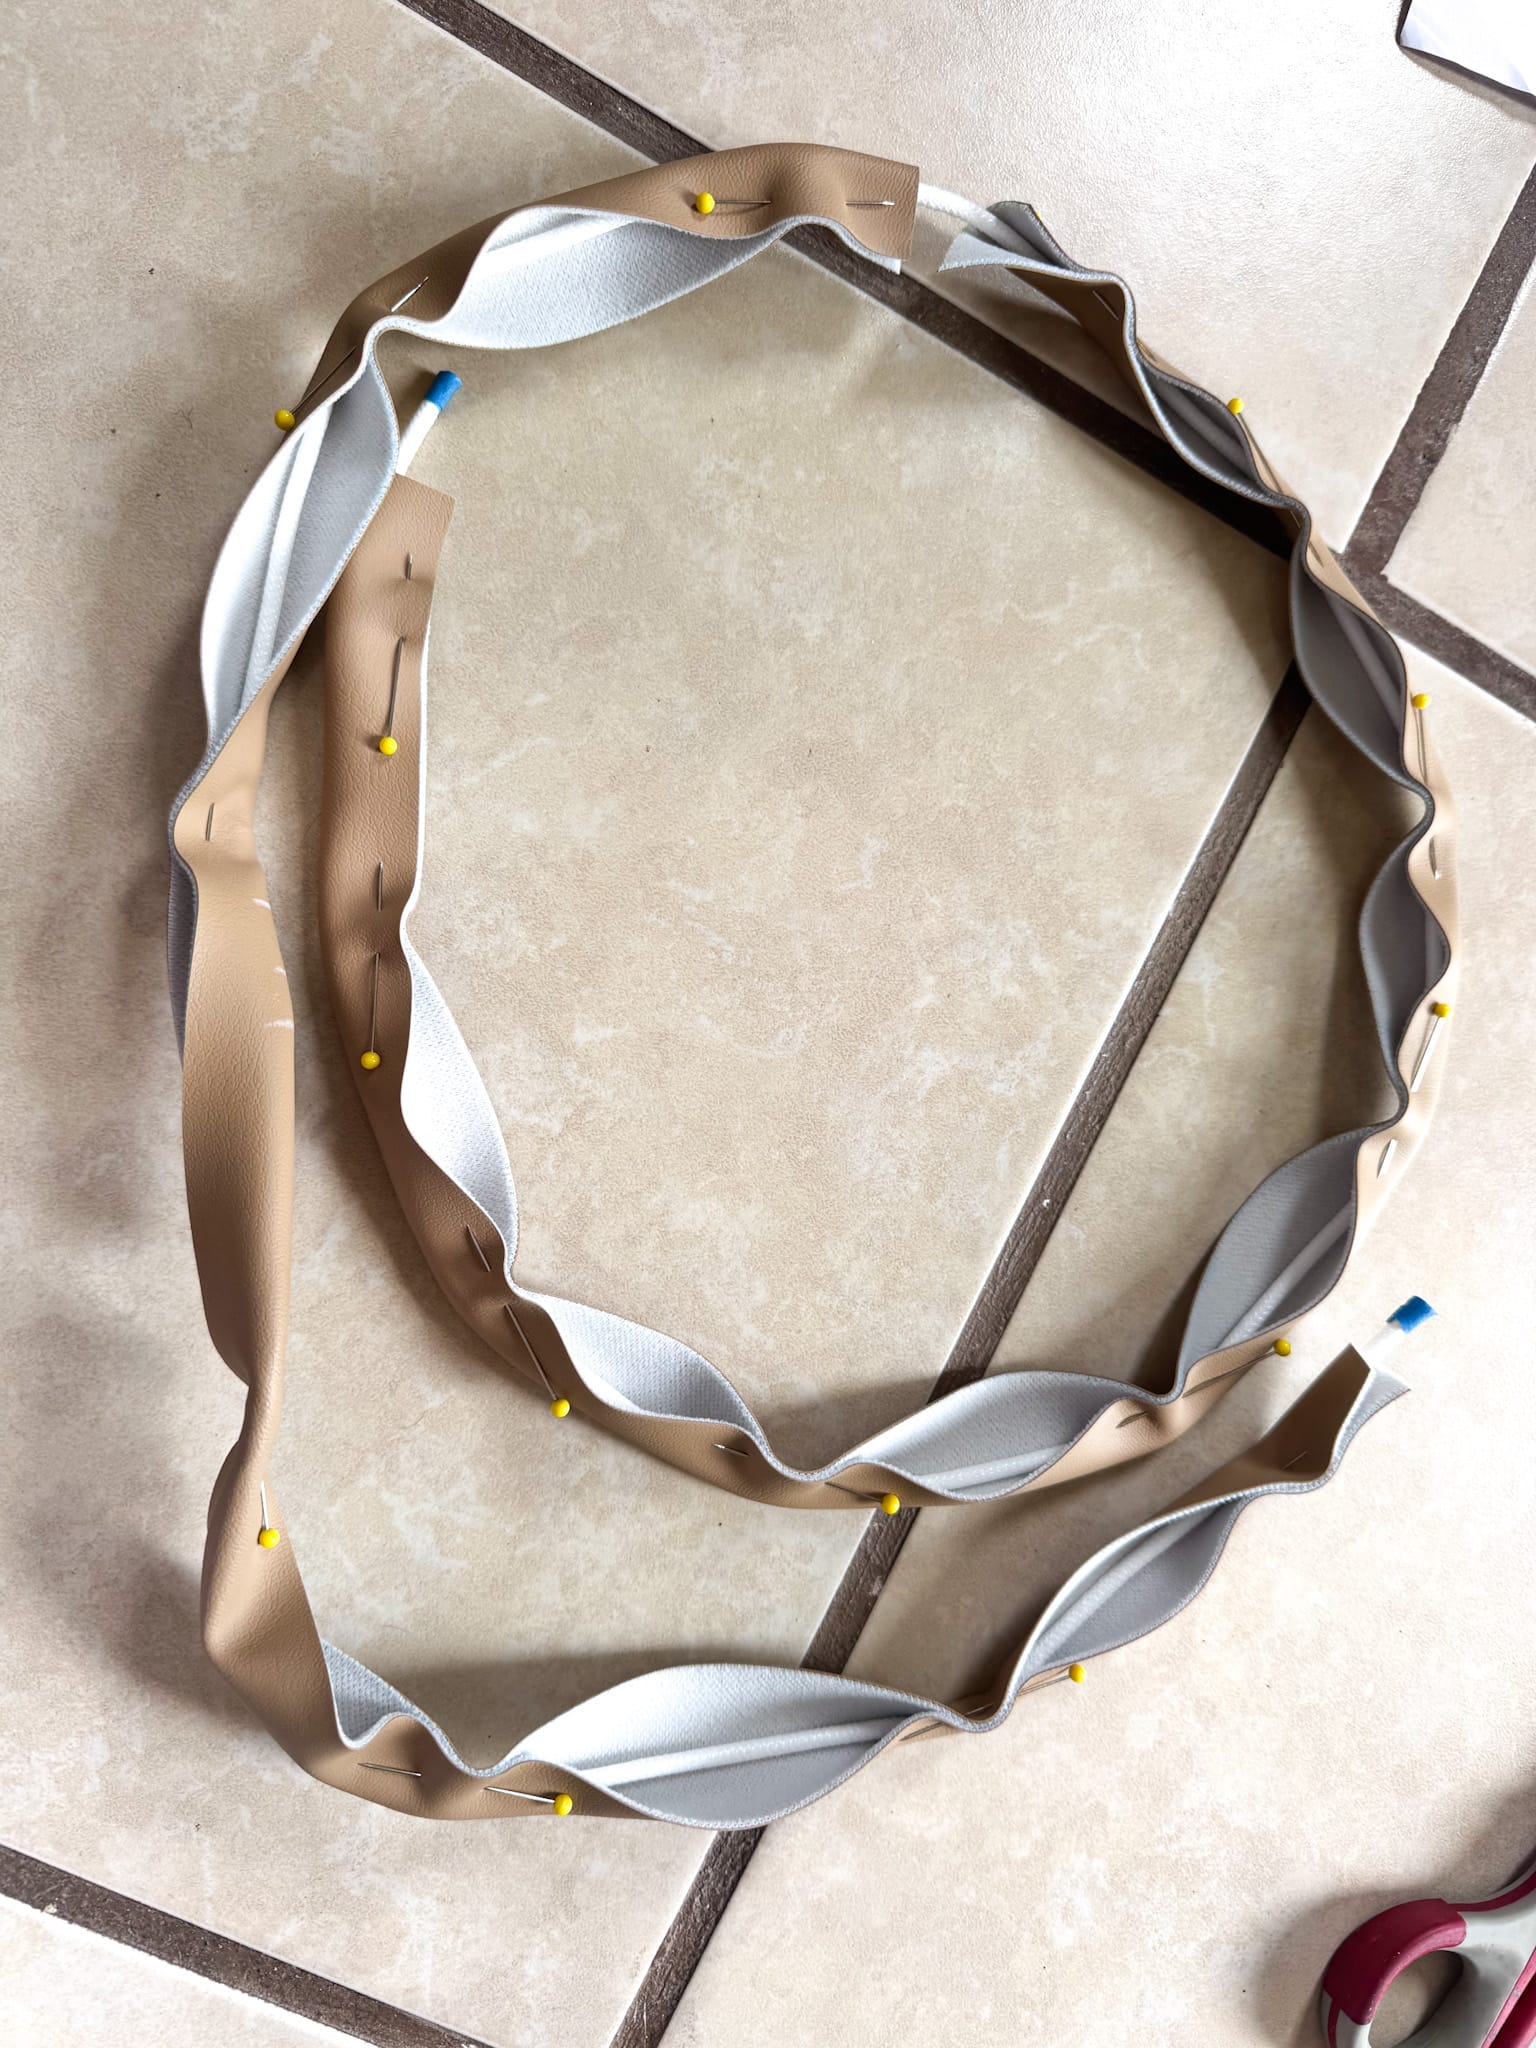
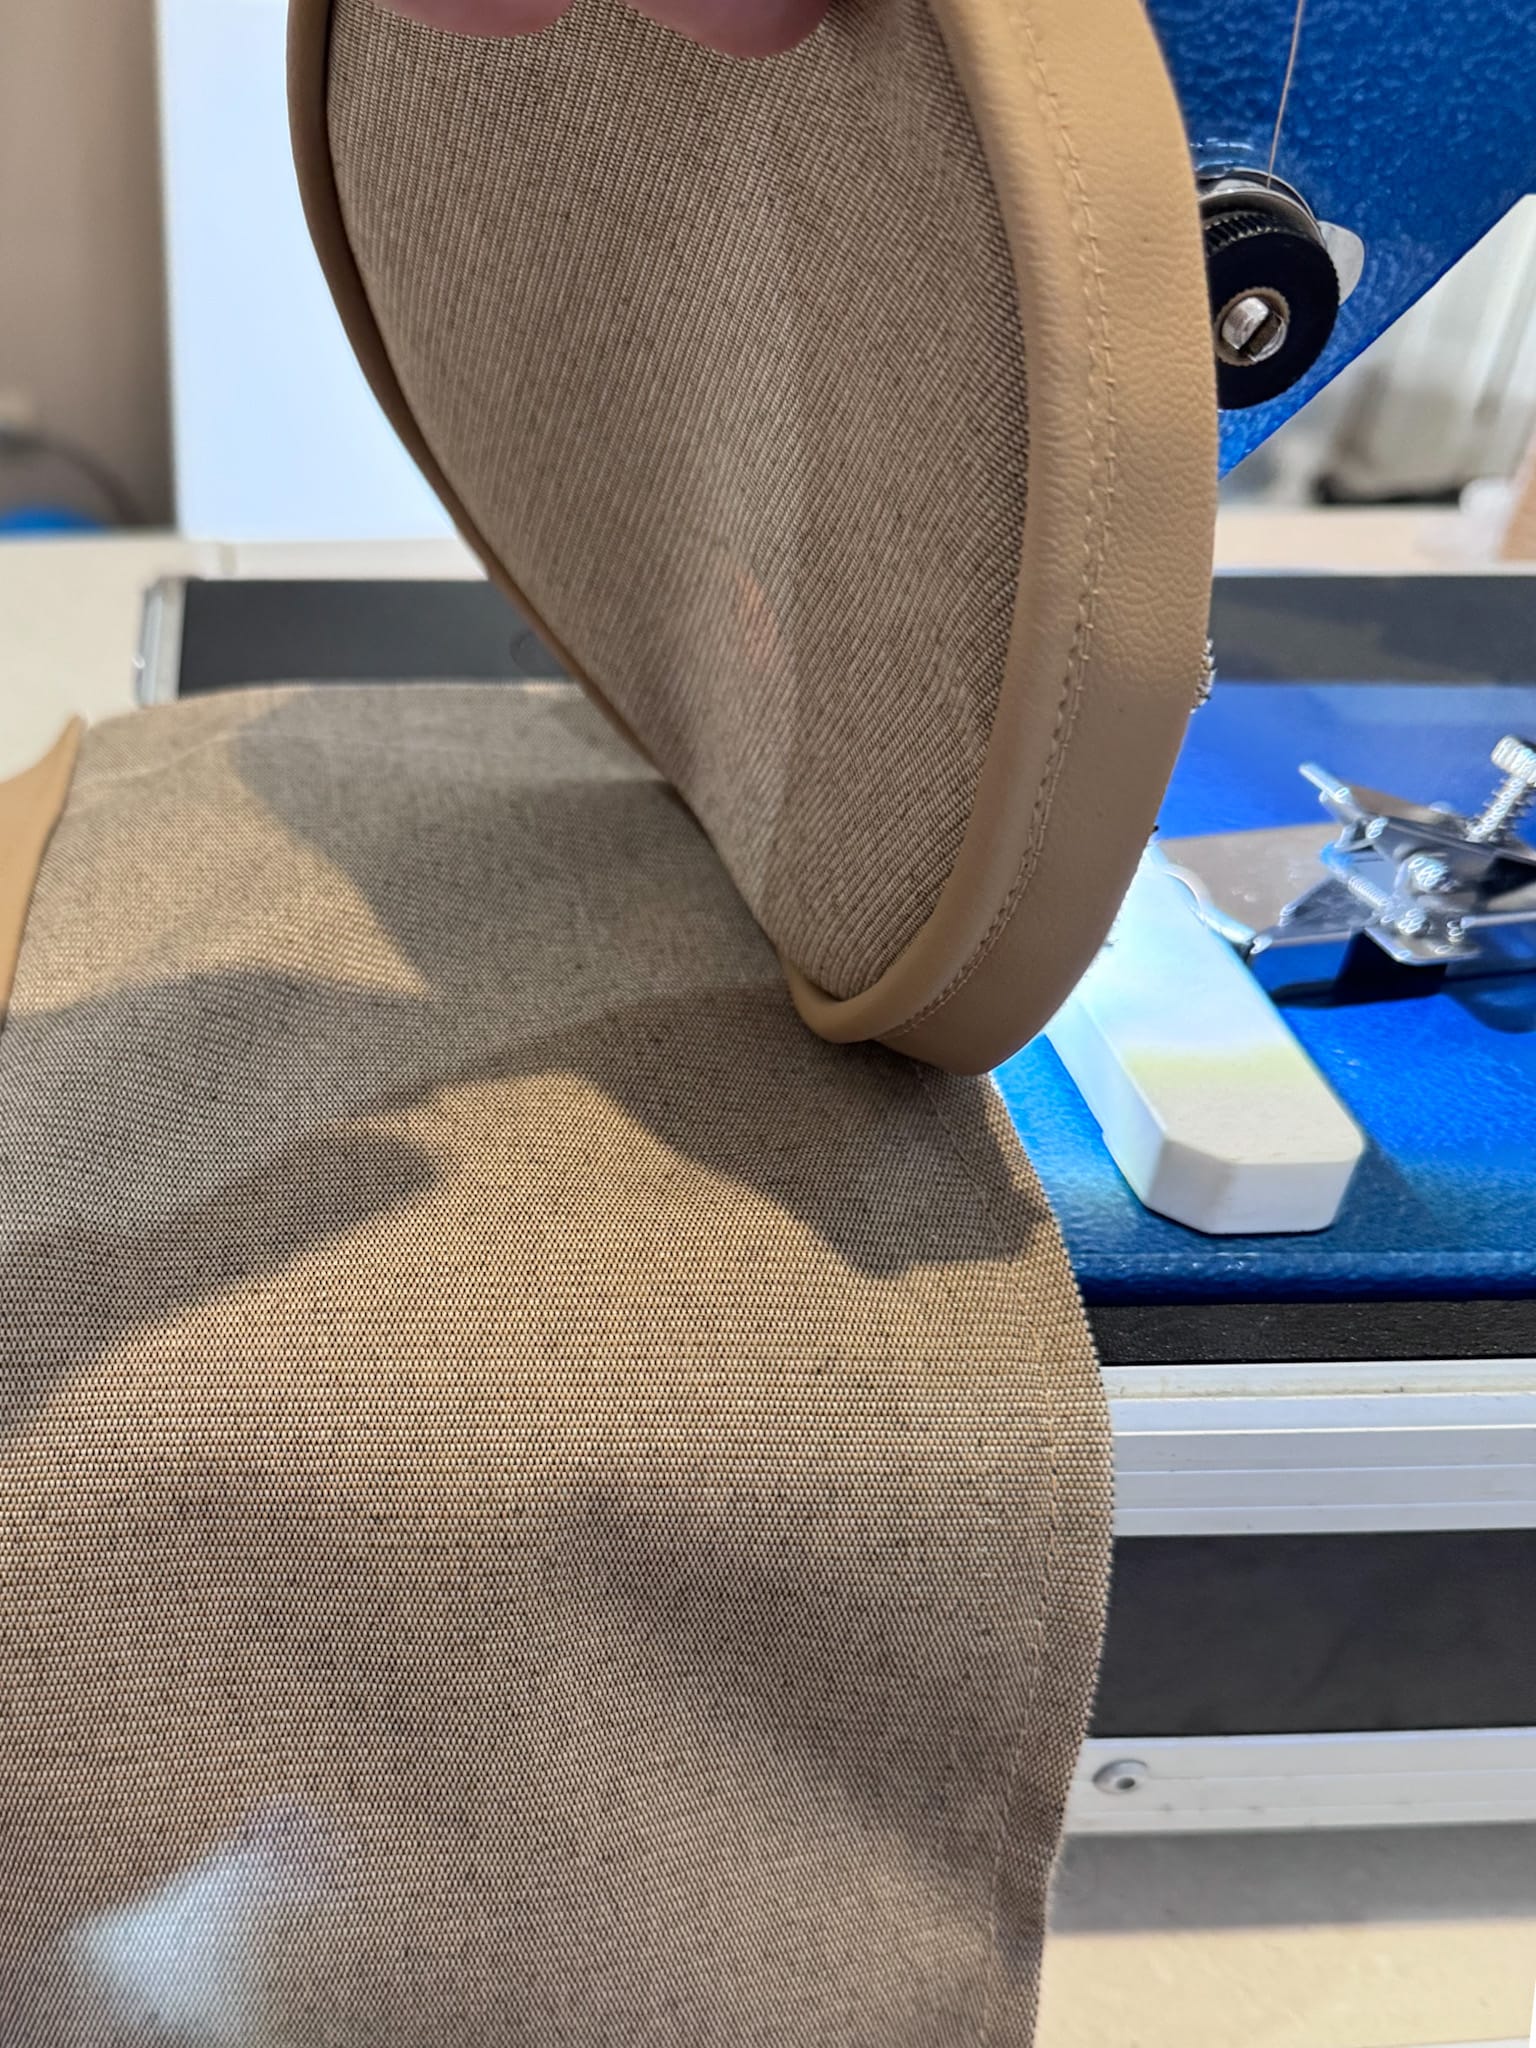
A. Attaching the Cording to the Top Circle
- Leave 3” of cording free at the start.
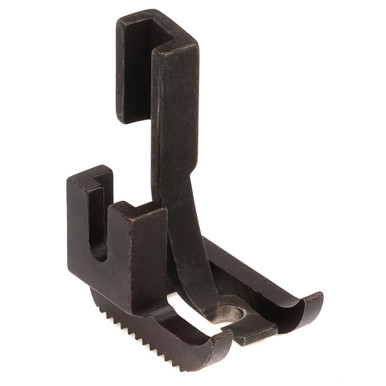
- Sew the cording onto the right side of the fabric using a cording foot with the needle in the center position.
- Stop 3” from the end, pull the cording out, match up and trim it (avoid overlapping or gaps in cording), overlap the cording fabric then finish sewing.
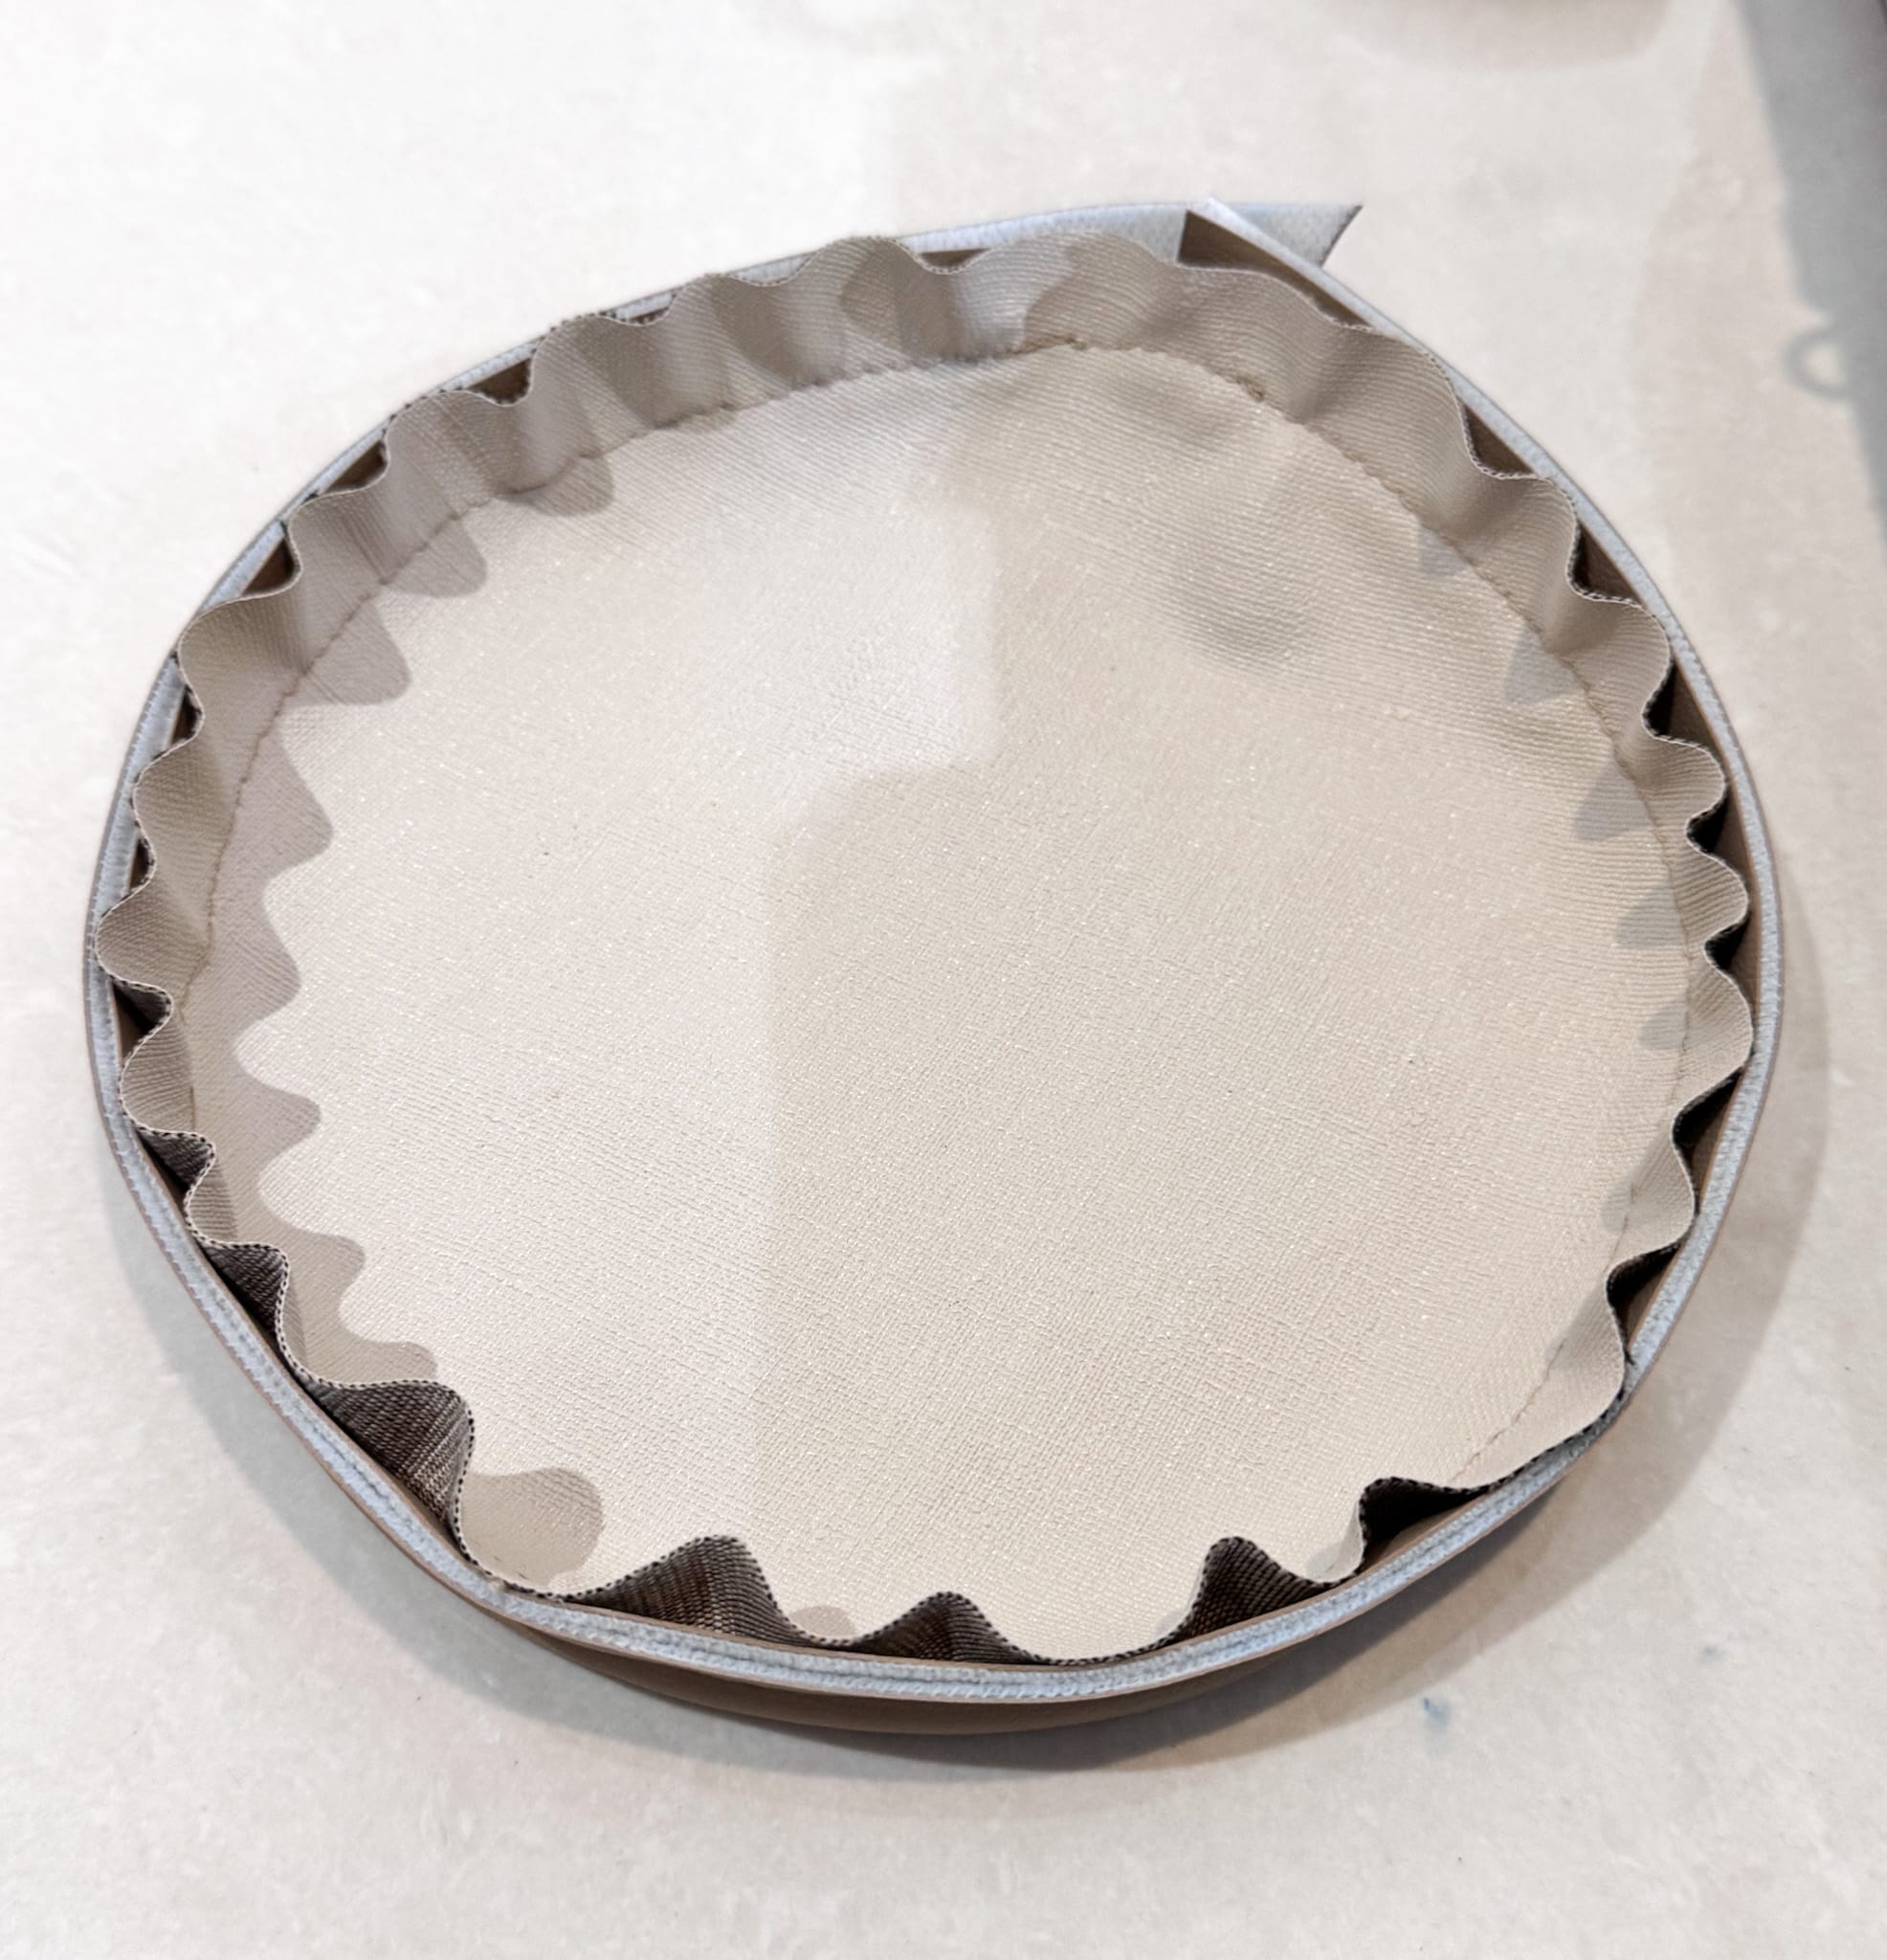
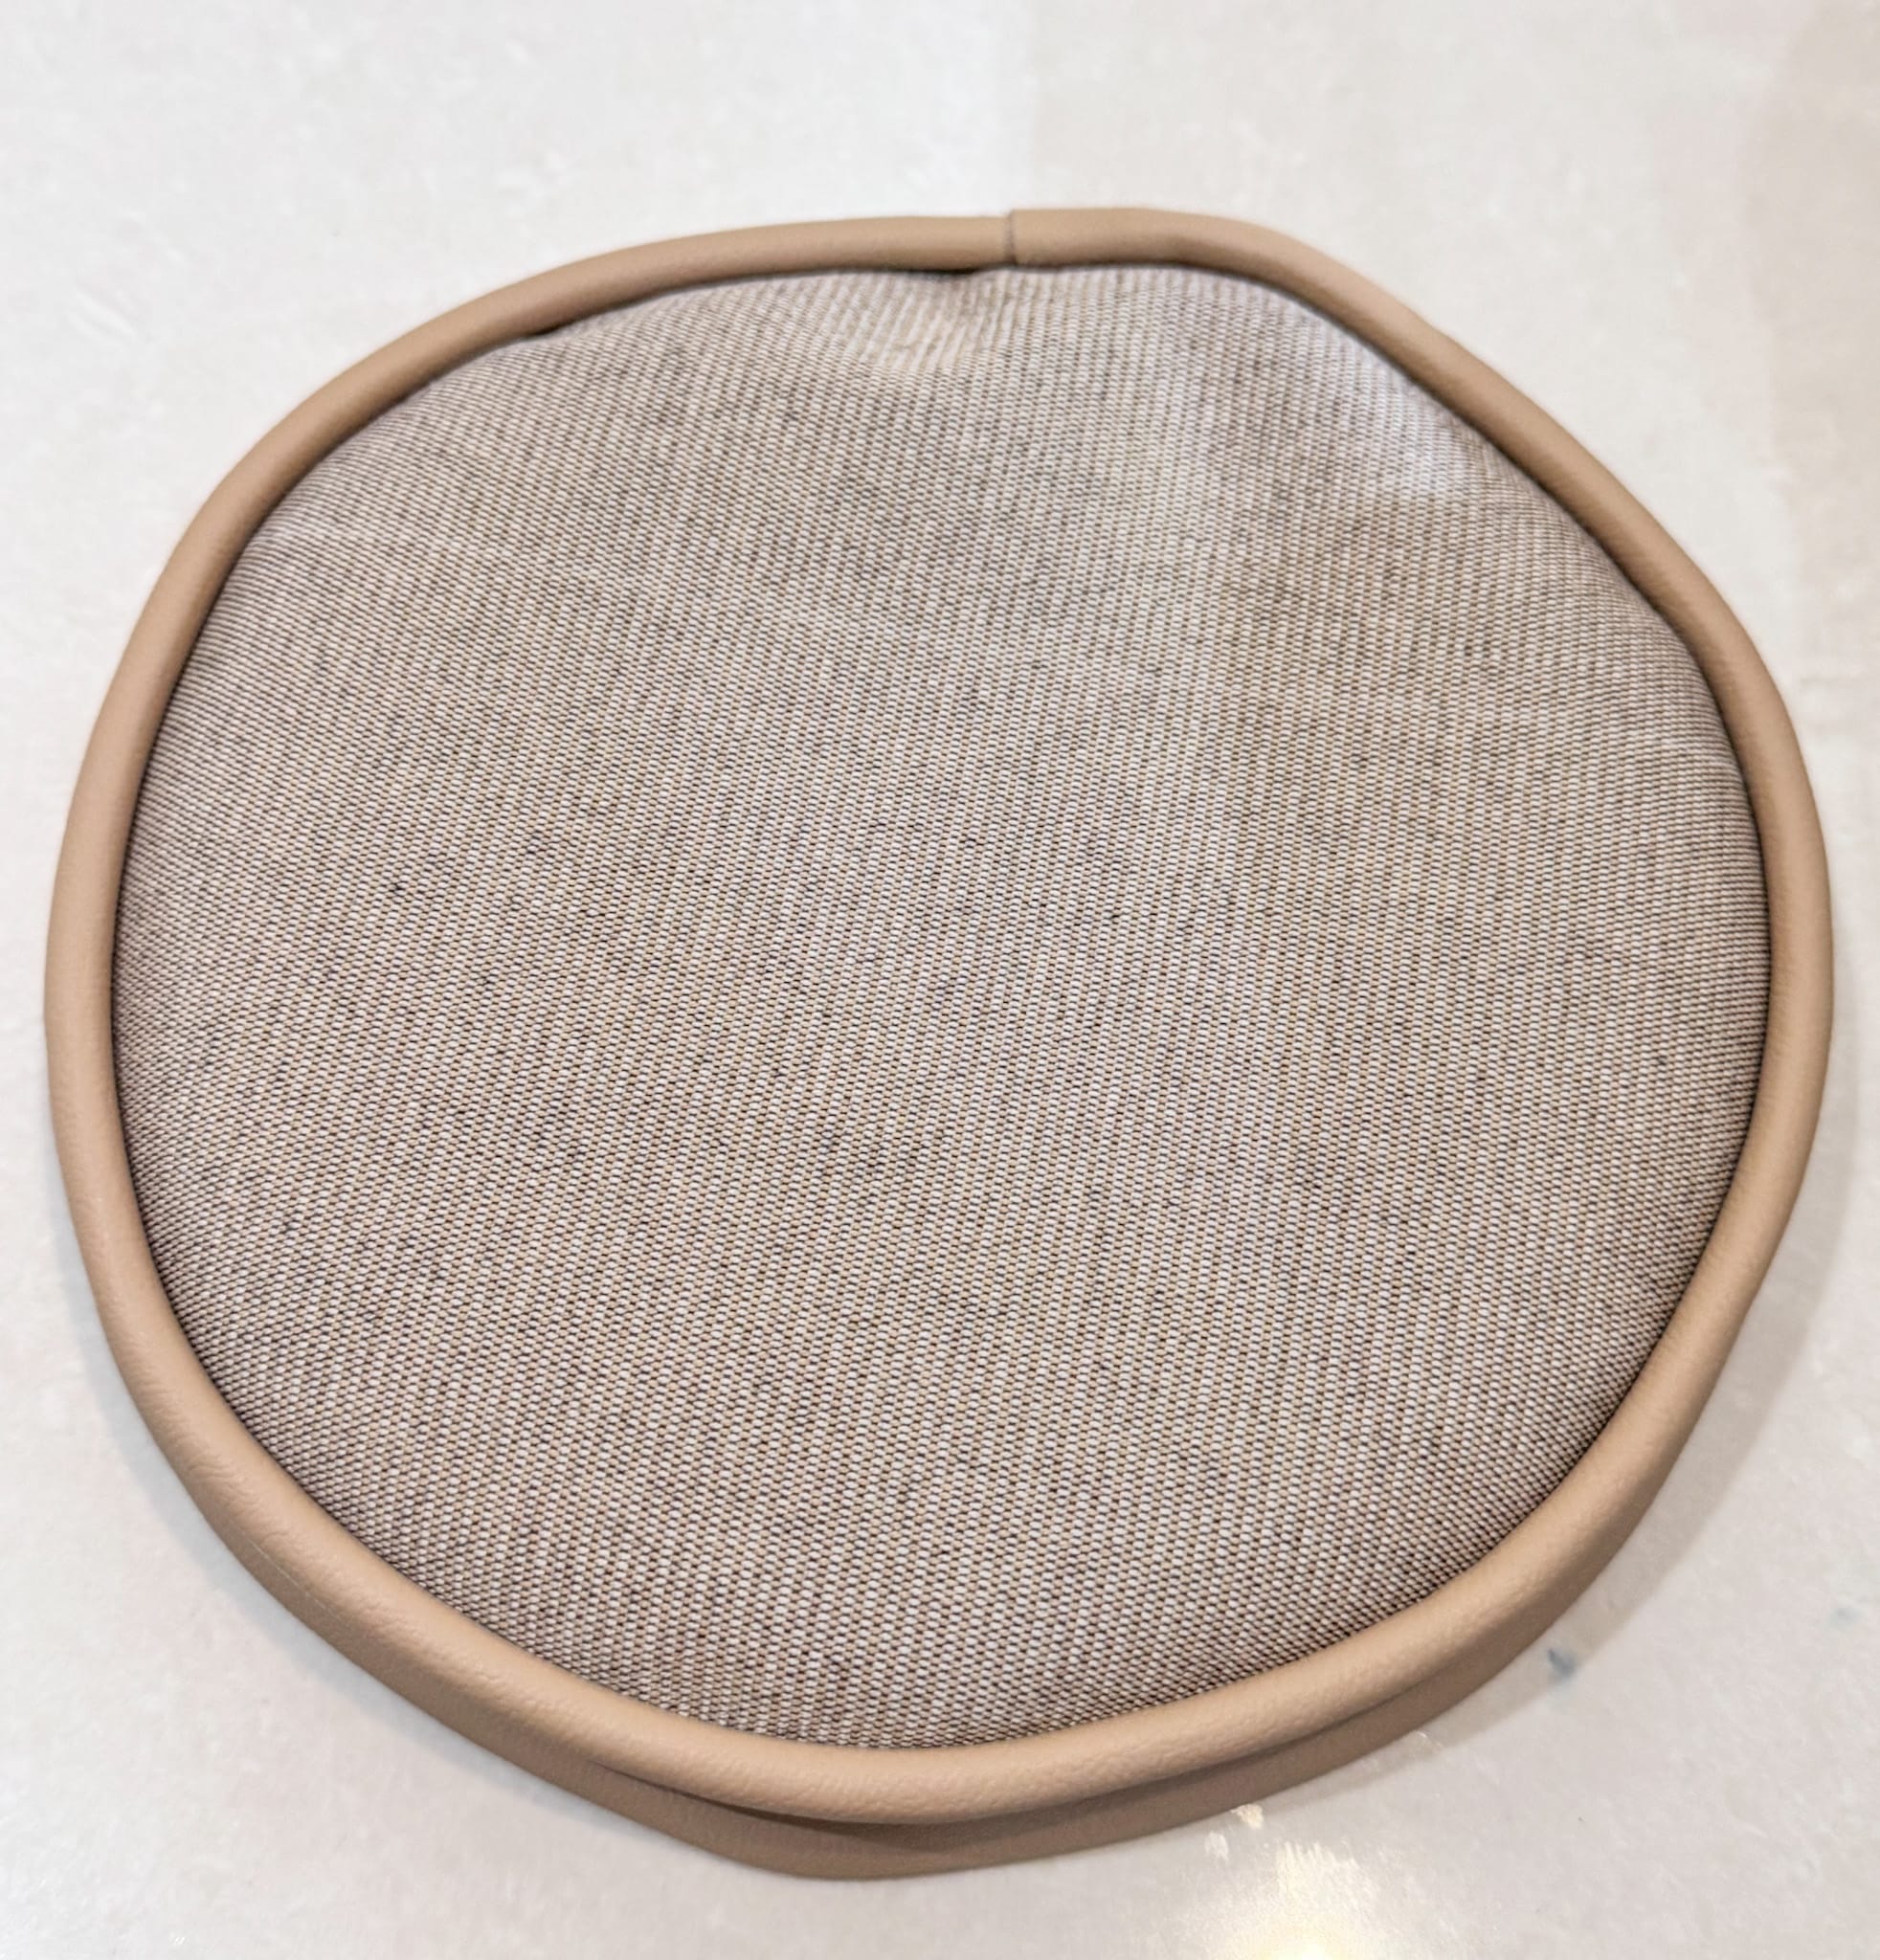
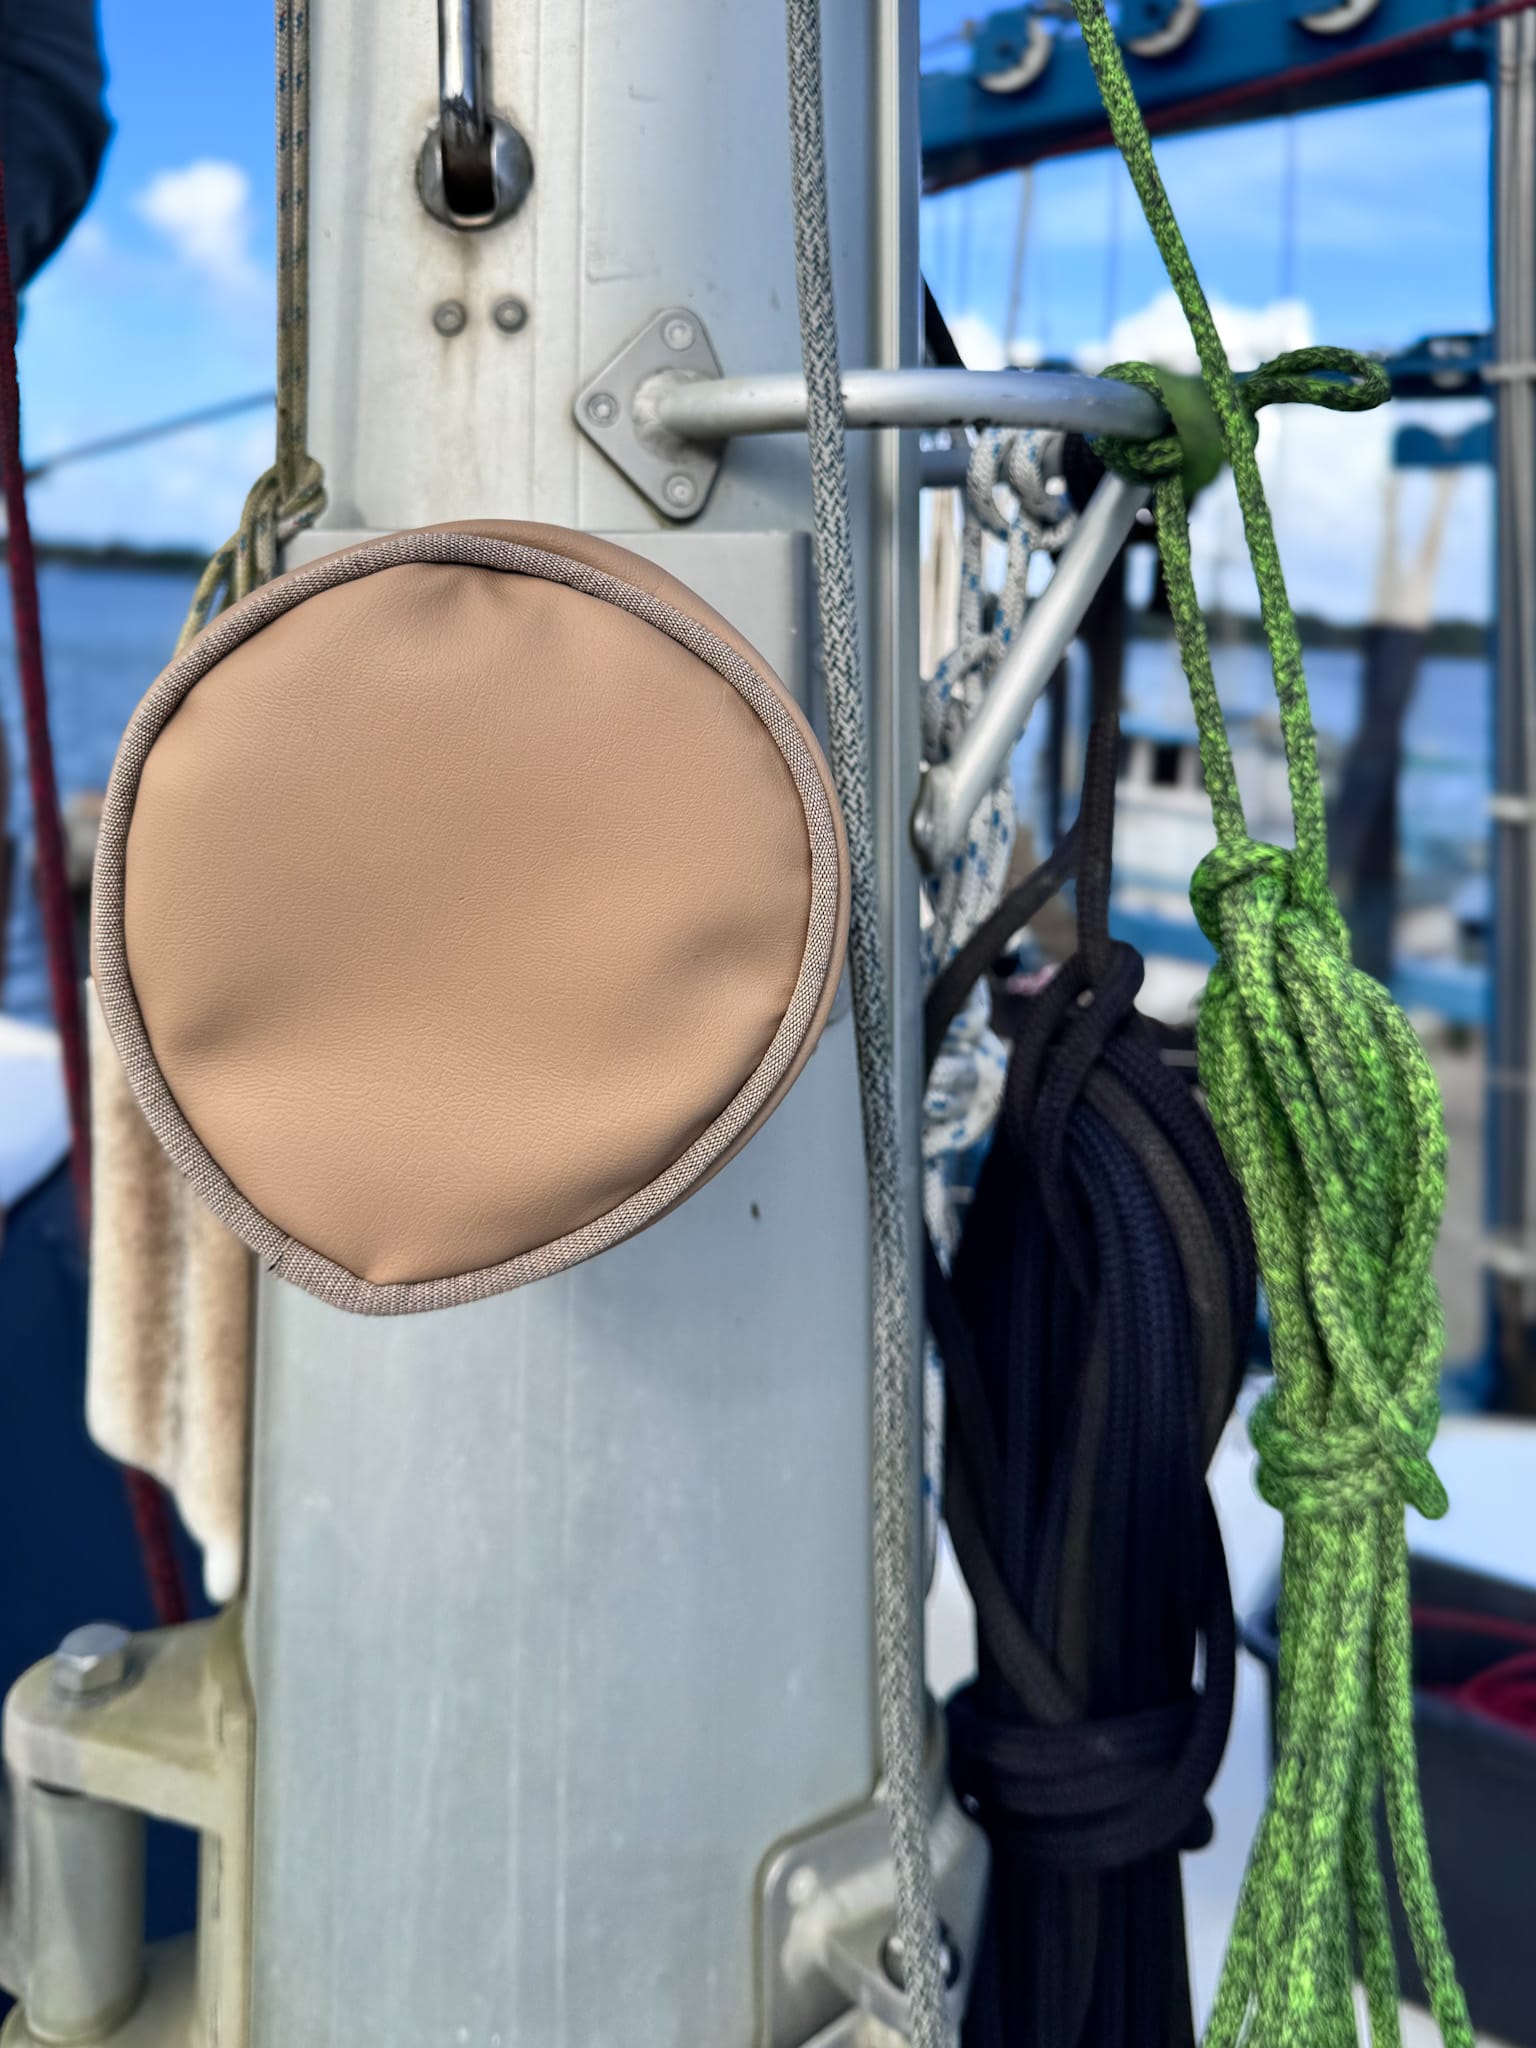
Circle top with cording sew on. .5" Seam allowance using cording foot with needle in center position.
B. Sewing the Side Fabric
- Bottom Hem: Fold 1” and sew a 0.5” seam allowance.
- If using multiple fabric pieces, sew them together with a 1/2" seam allowance before hemming the bottom.
- Fold the side piece in half and mark the center at the top.
C. Preparing the Choker
- Hem each side with a 0.5” fold, then sew a 0.25” seam allowance.
- Chalk-mark 1” for the bottom hem, lay the shock cord along this line, leaving an extra few inches at each end.
- Cut shock cord using a hot knife (or wrap it in painter’s tape and cut in the middle of the tape if no hot knife is available).
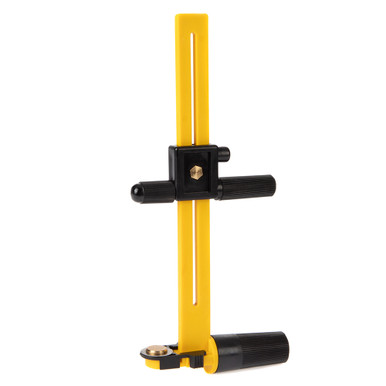
- Fold hem around shock cord, use Wonder Clips to hold in place, and sew hem with the shock cord to the outside right of the presser foot. Use magnetic seam guide to keep the shock cord close to the pressure foot. This will allow some space where the shock cord is.
- Fold choker in half and mark the center at the top.
D. Attaching the Choker to the Side Fabric
- Lay the Side Fabric wrong side up, then place the Choker right side down, aligning center marks.
- Sew with a 0.25” seam allowance.
E. Attaching the Side & Choker to the Top Circle
- Use cording foot with needle in the middle position, use .5" seam allowance
- Start sewing 3-4” from the edge and stop 3-4” before the end.
- Remove from the machine and match up the fabric around the remaining circle top.
- Line up both sides and mark where they meet.
- Measure and mark bottom hem: Circumference 22.5” + 1” = 23.5”. Don't make this smaller, but you can increase the number to make it wider. You can always resew this seam to make it tighter.
- Draw a slight angled line to match these marks (top smaller than bottom).
- Sew along this line and trim 0.75” from the top seam allowance to reduce bulk.
- Finish sewing the Circle Top.
F. Finishing Touches
- Turn the winch cover right-side out and test the fit.
- Pull the shock cord tight and tie a secure knot, cut off excess.
- Heat-seal tape inside seams for waterproofing.
- Spray using 303 Fabric Guard according to instructions.

First, slip on the choker, then pull the sides down to test the fit.
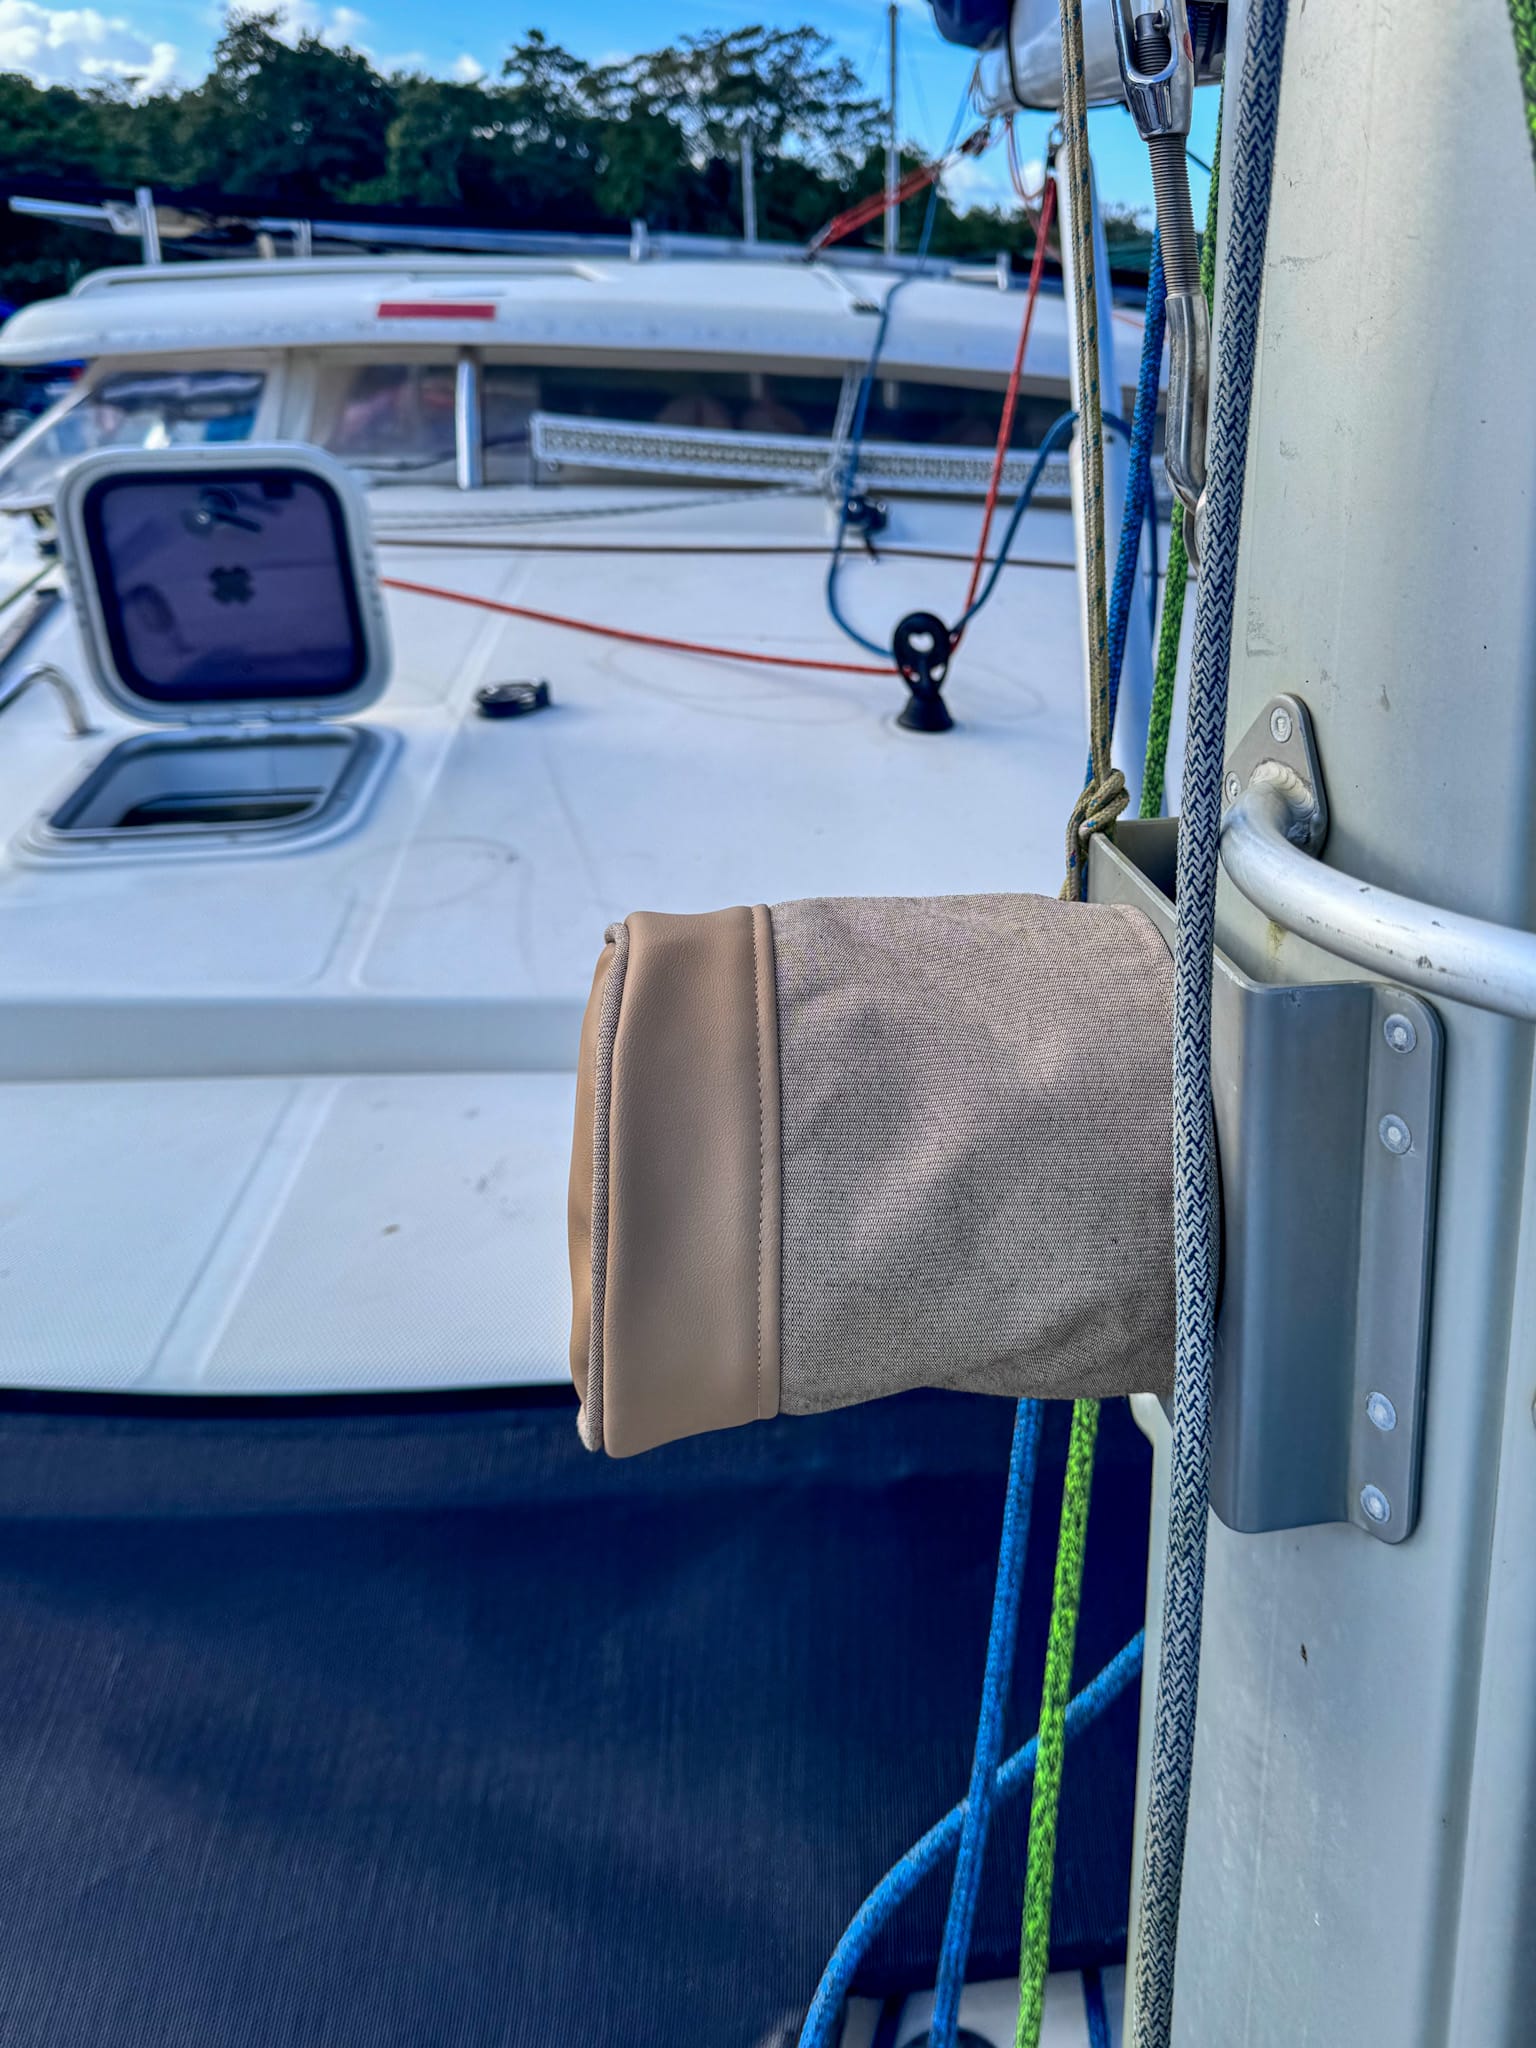
When the winch is horizontal, the sides should fit snugly. If the cover is positioned vertically, a slightly looser fit is acceptable.
G. How to Clean
- Use a damp rag with Dawn dish soap.
- Let dry.
- Reapply 303 Fabric Guard using a spray bottle.

Final Thoughts
With these adjustments, your winch cover will have a better fit, improved ease of use, and a more tailored look. Happy sewing and smooth sailing!
Please let me know how this pattern worked for you and if you made any adjustments to make it even better. I love sharing ideas! Contact me squidandjellysgreatadventures@gmail.com

Read our other articles:
Our Favorite Snorkel Gear for Unforgettable Adventures
Electrical Energy – Powering Your Boat Efficiently
Powering Your Boat: The Ultimate Guide to Energy Storage & Usage
Sailboat Parts Reviews: RuuviTag Pro Sensor
How to Save Big on Sailboat Parts: Our Top Buying Secrets and Where to Shop Online
👍 Stay connected and join the fun on Facebook! Squid and Jelly's Great Adventure
📸 Follow our island adventures on Instagram! → squidandjellysgreatadventure
We hope we brought a little extra sunshine to your boat project—whether through our knowledge, helpful tips, or just our irresistible charm! If you'd like to show your appreciation, a small tip could treat a local pup or kitty to a snack (Su has a soft spot for feeding the local strays 🐾), and a little more might just fund a well-earned sundowner (cheers to you! 🍹).
A Click That Helps! 🛠️⚓
If you find our recommendations helpful and decide to shop using our affiliate links, we’ll get a little something in return - at no extra cost to you! Every click helps support our effort to help you by providing free patterns and tutorials Thanks for being awesome! 💙
Escape to Paradise at Treasure By The Sea Bonaire! 🏝️🐠
Discover the perfect blend of luxury and adventure at our boutique resort, offering a beautifully designed studio, a cozy one-bedroom house, and a spacious two-bedroom house—all just steps from the Caribbean Sea. Snorkel 🤿 or dive 🫧 right from our shore and explore a vibrant house reef teeming with marine life 🦐🐠. Take a scenic 5-10 minute stroll along the oceanfront boulevard to downtown Kralendijk, where you can enjoy shopping 🛍️ and dining 🍽️. Our resort offers everything you need for a perfect stay, including private parking 🛻, a rinse tank and secure outdoor storage lockers for your gear, an outdoor kitchen and BBQ grill 🔥, plus a refreshing outdoor shower 🚿 and clothesline for added convenience. Book your stay today at TreasureByTheSeaBonaire and take advantage of our special offers - use discount code SAJGA10 to save 10% off your stay. We can’t wait to welcome you and make you part of our growing family of repeat guests! 😊🇧🇶
👍 Follow us on Facebook! Treasure By The Sea Bonaire
📸 Follow us on Instagram! TreasureByTheSeaBonaire


Stay. Snorkel. Dive. Explore. Relax. Let Treasure By The Sea Bonaire be the highlight of your Caribbean escape. 🐠
